


Climbing in Shodosima means enjoying granite walls under warm sunlight, with the Seto Inland Sea stretching endlessly below you — for climbers, it’s close to perfect.
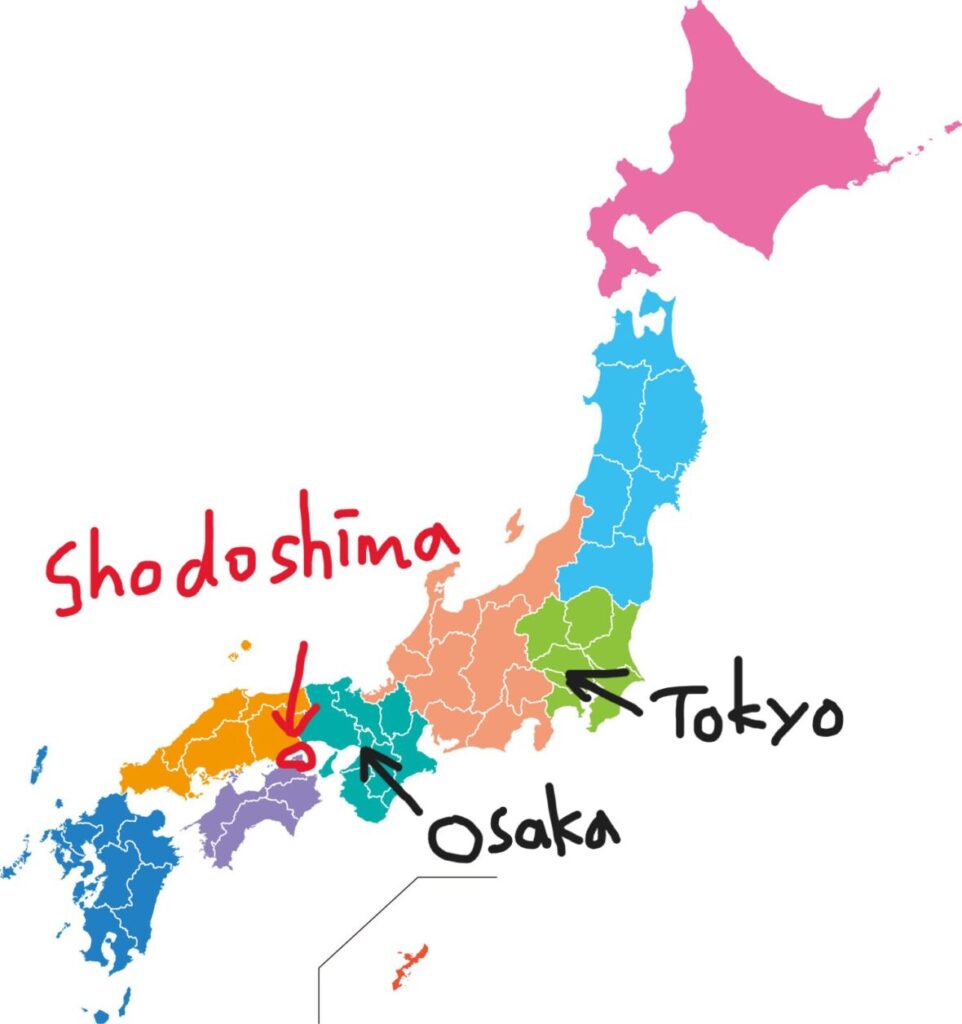
Shodoshima is a small island in western Japan, often called “the Mediterranean of Japan” thanks to its mild climate and relaxed island rhythm.
What many people don’t realize is that Shodoshima is also rich in high-quality rock.
In this article, I’ll introduce Oyayubi-dake (Thumb Peak), the only multi-pitch climbing area on Shodoshima — a historic crag with the best views on the island, and a place that left a deep impression on me.
Contents.
1.Overview – Oyayubi-dake
Shodoshima has several sport climbing areas, but only one multi-pitch crag: Oyayubi-dake.
This wall has been climbed for decades, even before free climbing became common in Japan. Early ascents were done using aid climbing, and that history still lingers in the atmosphere of the routes.
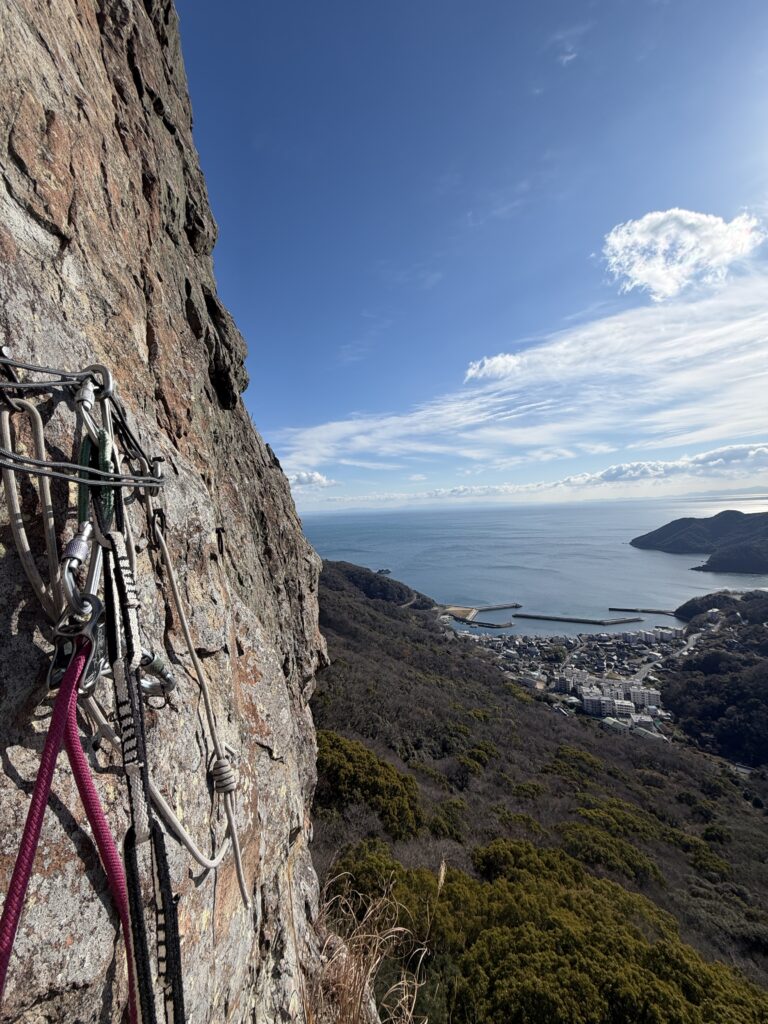
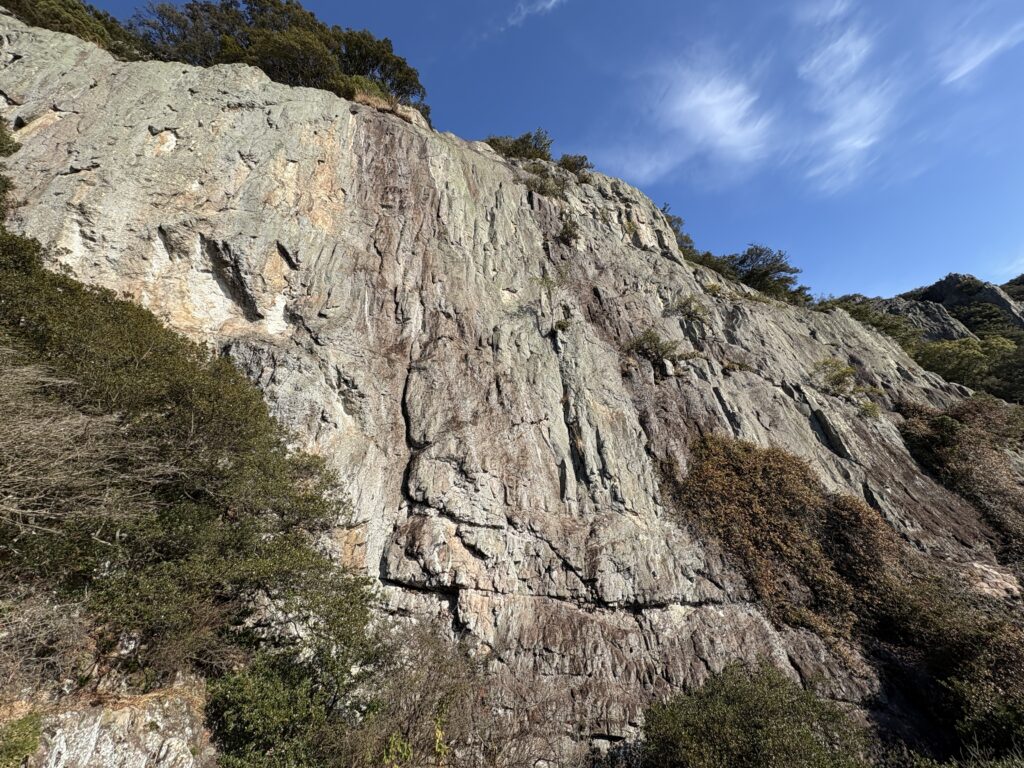
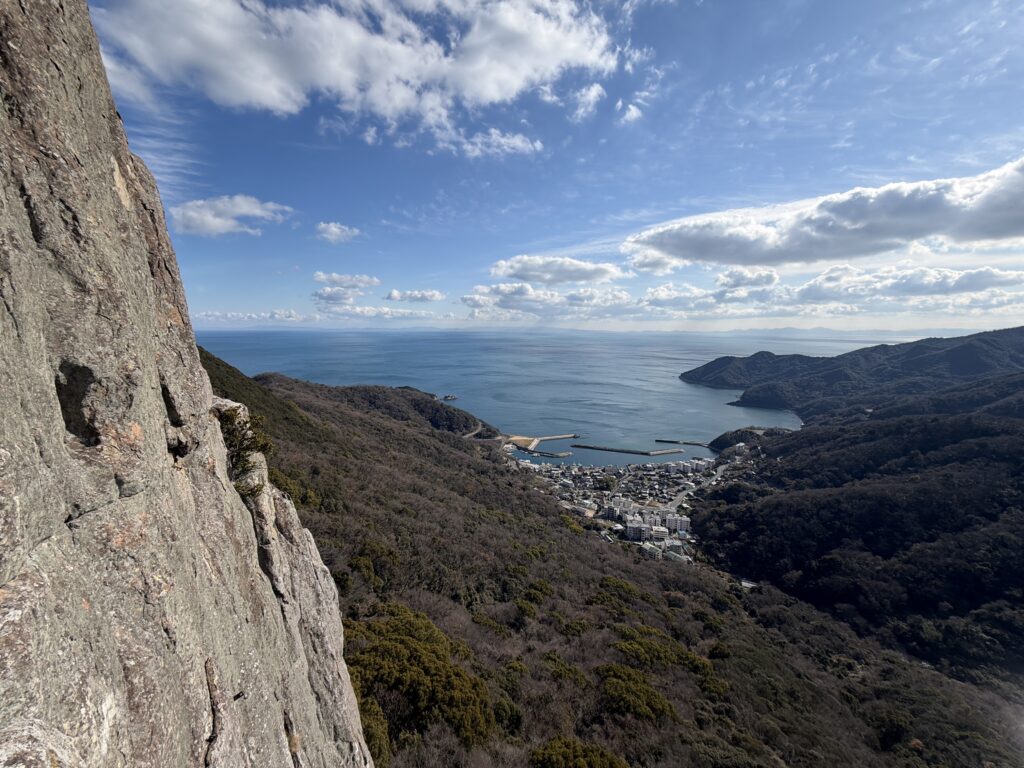
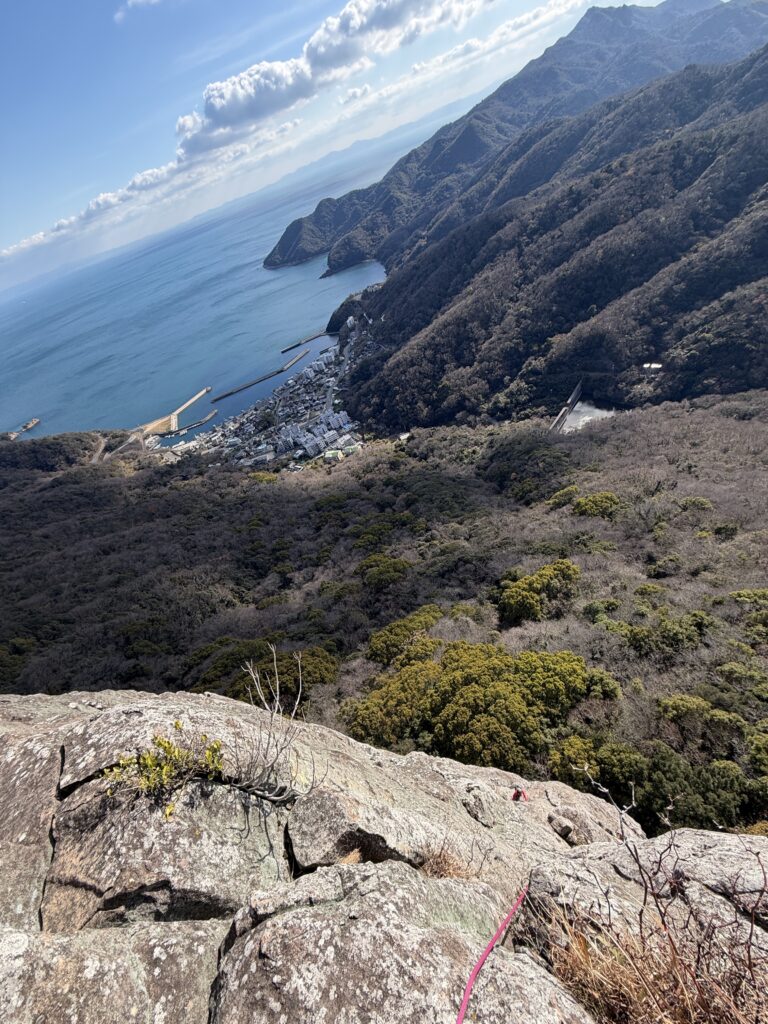
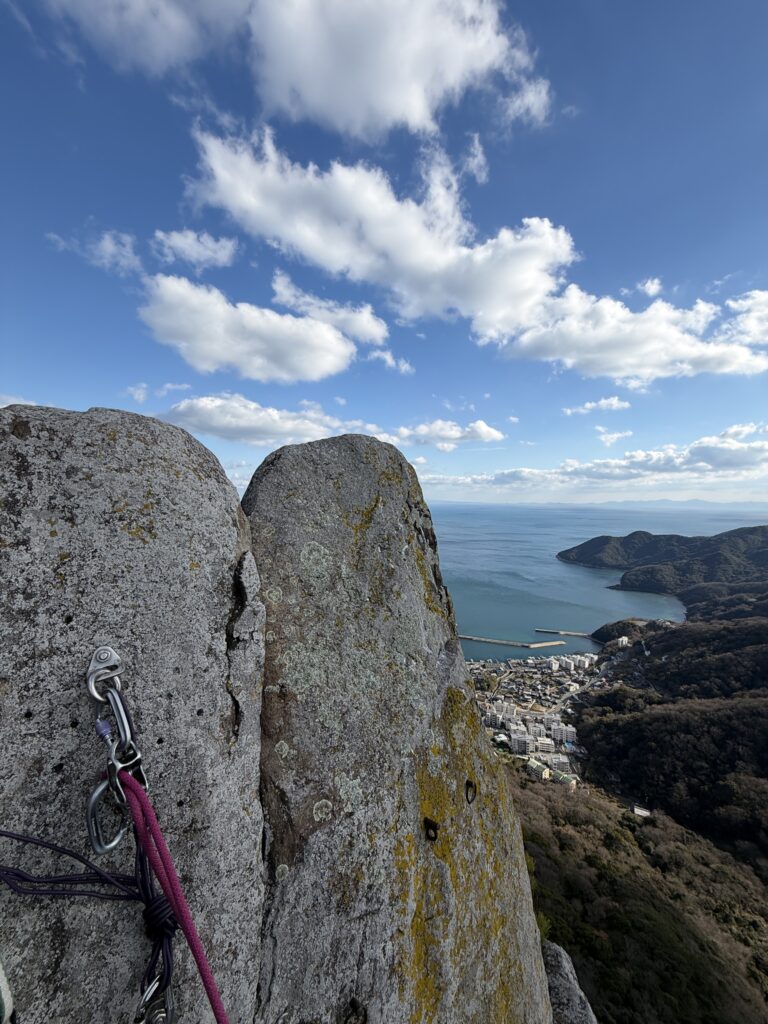
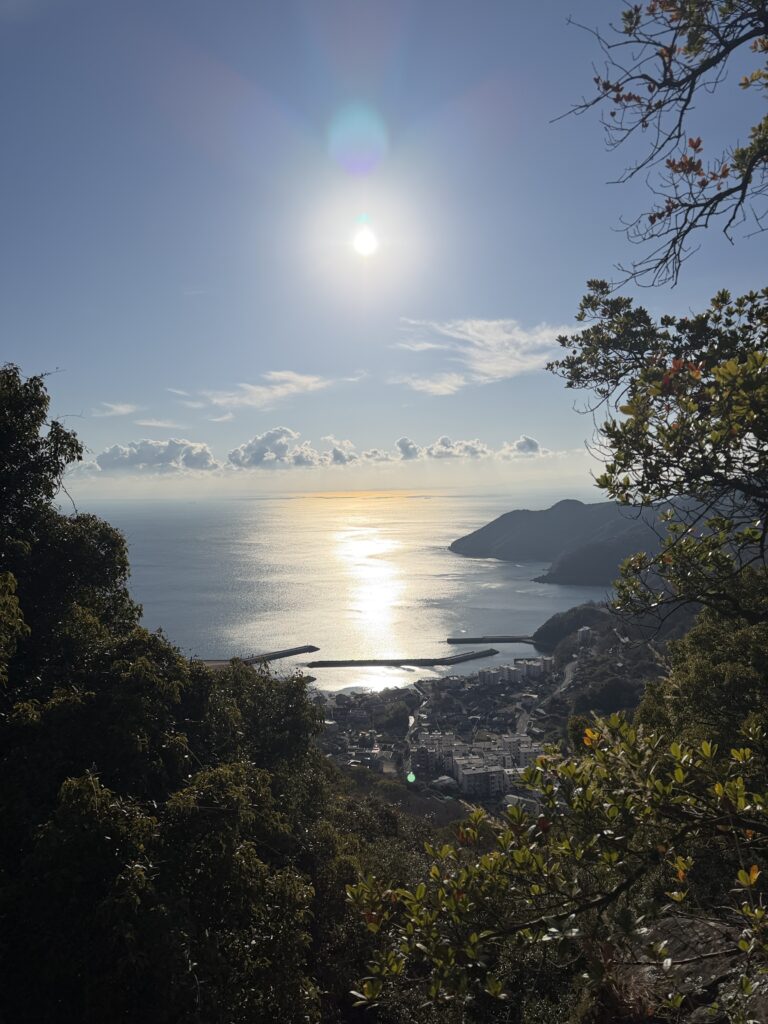
Its greatest appeal is, without question, the outstanding views.
Oyayubi-dake can be seen clearly from town, and its distinctive shape alone is enough to make any climber want to stand on it one day.
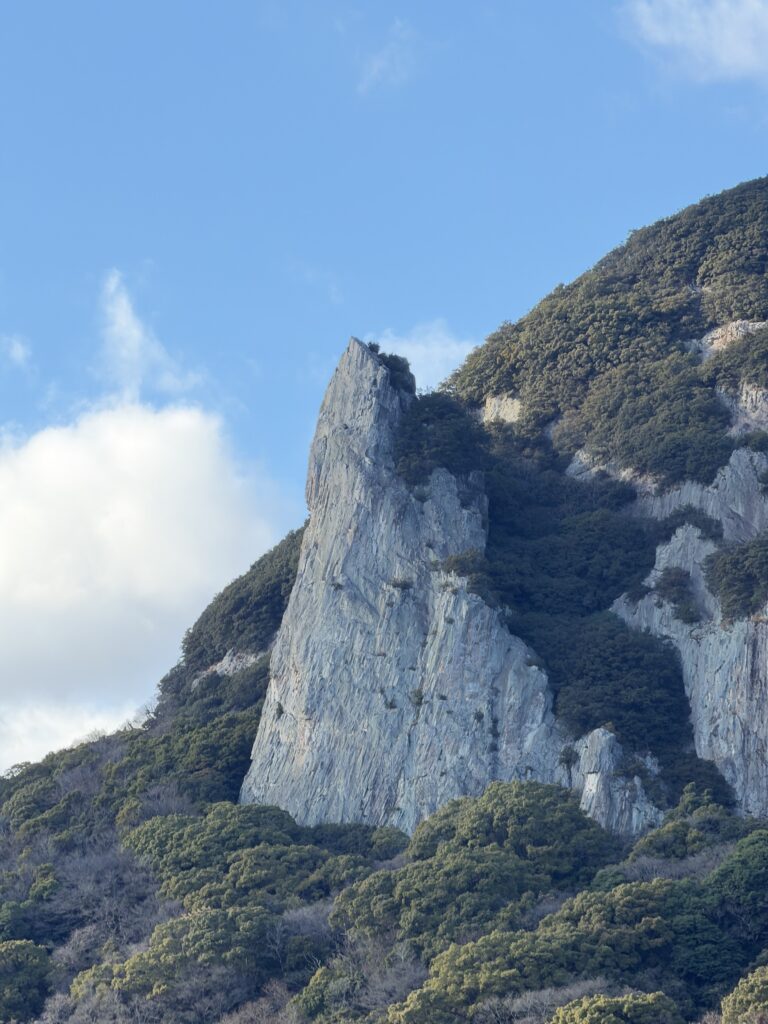
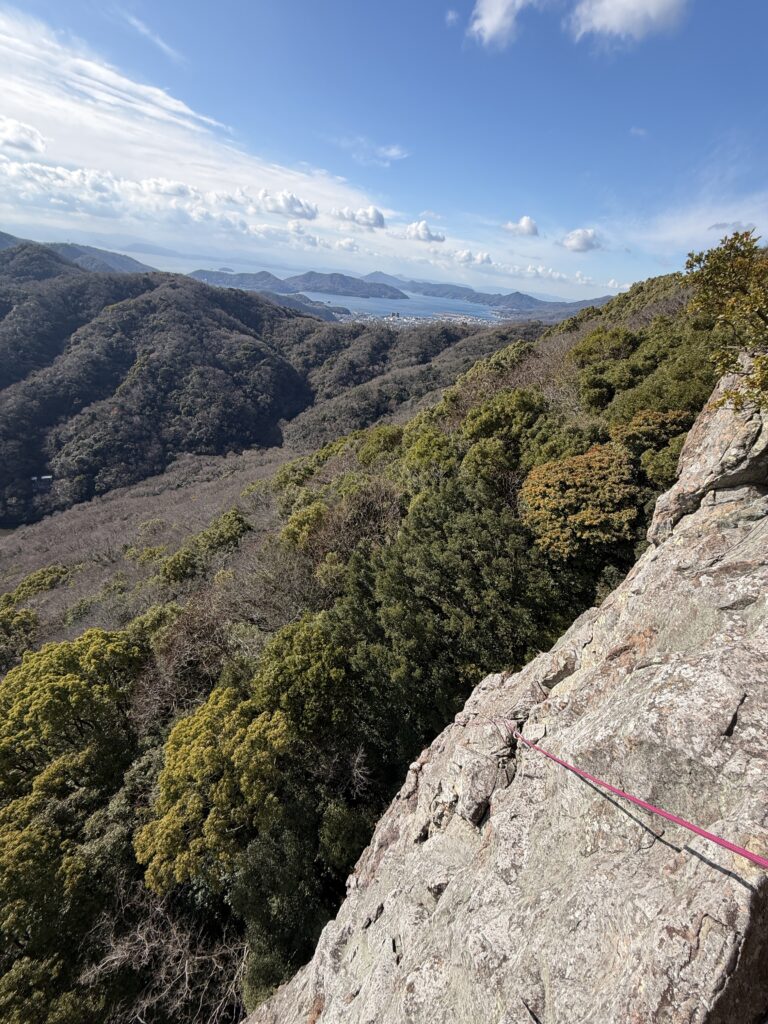
In other words, this is a wall that can be seen from afar — which also means you are climbing an always-exposed line. For a multi-pitch route, this kind of environment is close to ideal.
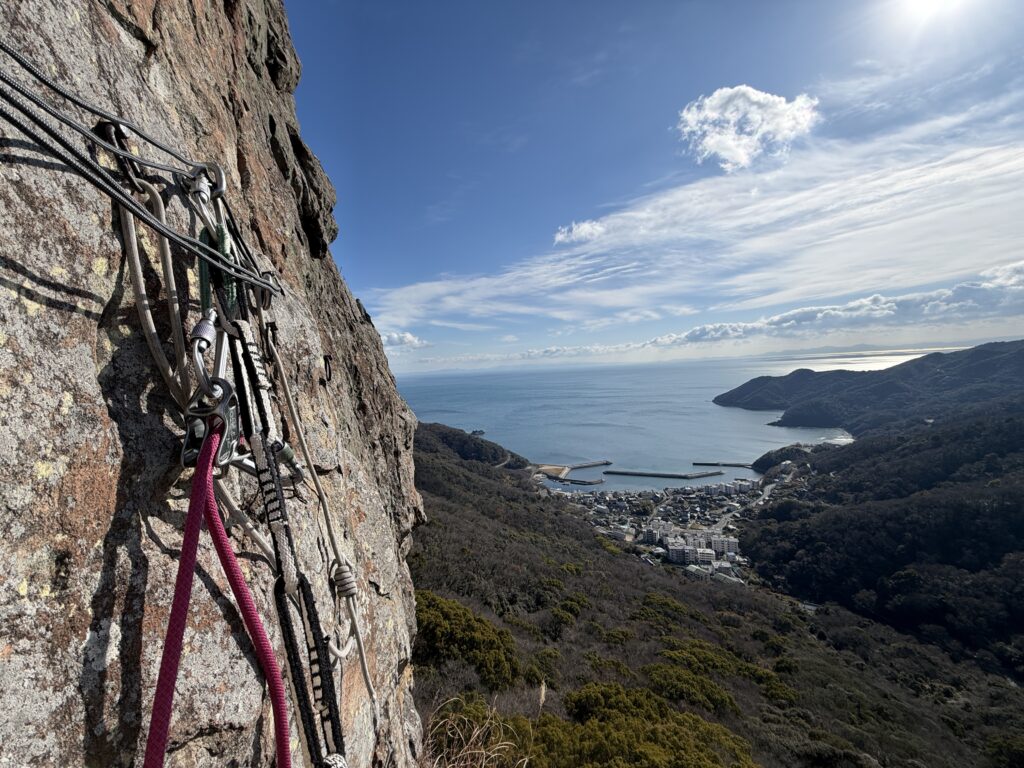
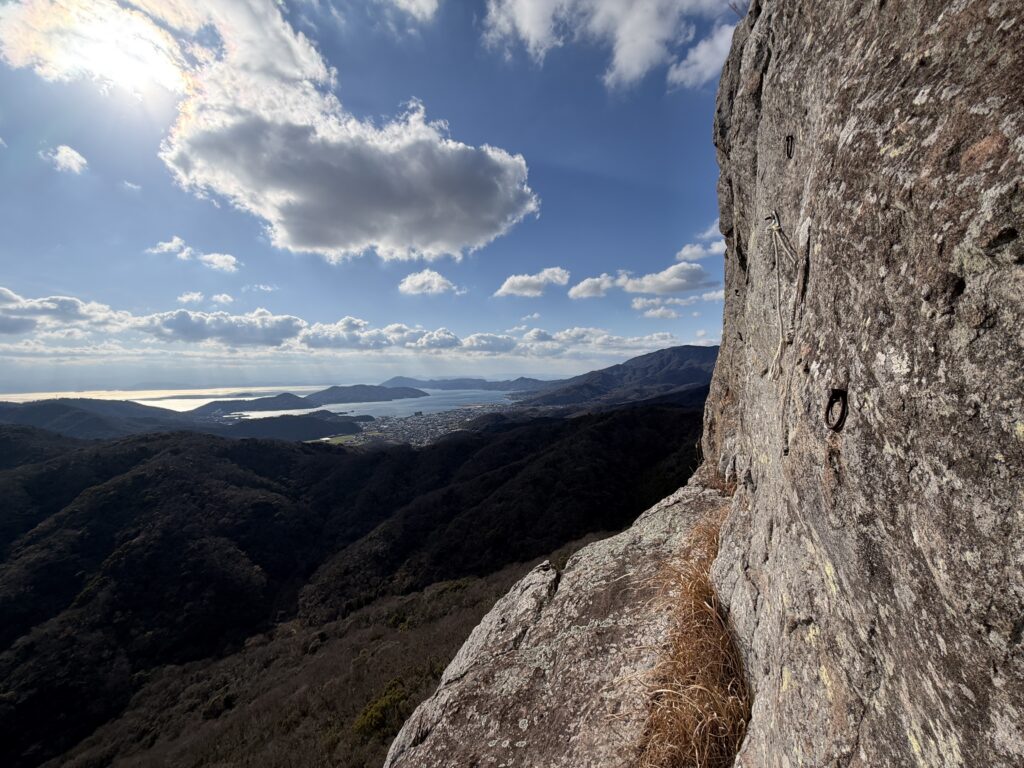
As you climb, the calm, shimmering Seto Inland Sea is always below you. Among all the climbing areas on Shodoshima, I can confidently say that Oyayubi-dake offers the best views.
But it’s not just about scenery.
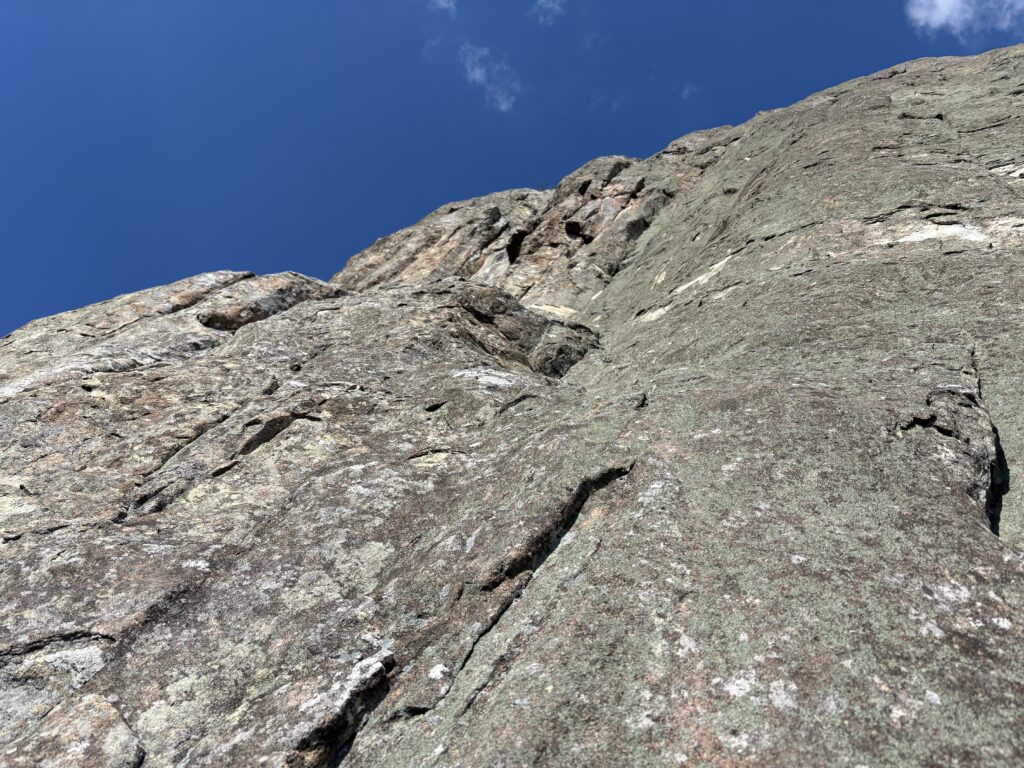
The climbing itself is varied and engaging — chimneys, small roofs, face climbing, and cracks all appear across the routes.
There are several routes on the wall, so you can choose your route depending on your team’s ability.
2.Crag Information
Rock type: Granite
Number of routes: 10 (but only 4 are currently being climbed regularly)
Number of pitches: 5
Rope: 50 m is generally sufficient (possible to retreat by rappelling.)
Protection: Nuts and cams (trad rack) are essential. Quickdraws are useful.
Some old fixed pitons and ring bolts exist, but many are very old and unreliable — do not rely on them
3.Season
Best months: Late October – early April
Summer: Too hot for climbing
Winter: Stable weather, excellent friction
Snow is rare but possible — bring warm layers. Winter mornings were cold enough to numb my fingers, but once the sun reached the wall, the granite felt perfect.
Compared to Yoshida Crag (shodoshima’s main climbing area) , which has shaded forest sections and can sometimes be climbed in early summer, Oyayubi-dake is fully exposed. After April, climbing here becomes unrealistic.

4.Guidebook (Topo)
There is no standalone topo for Oyayubi-dake.
Some route information is published in the Japanese climbing magazine: ROCK & SNOW 098

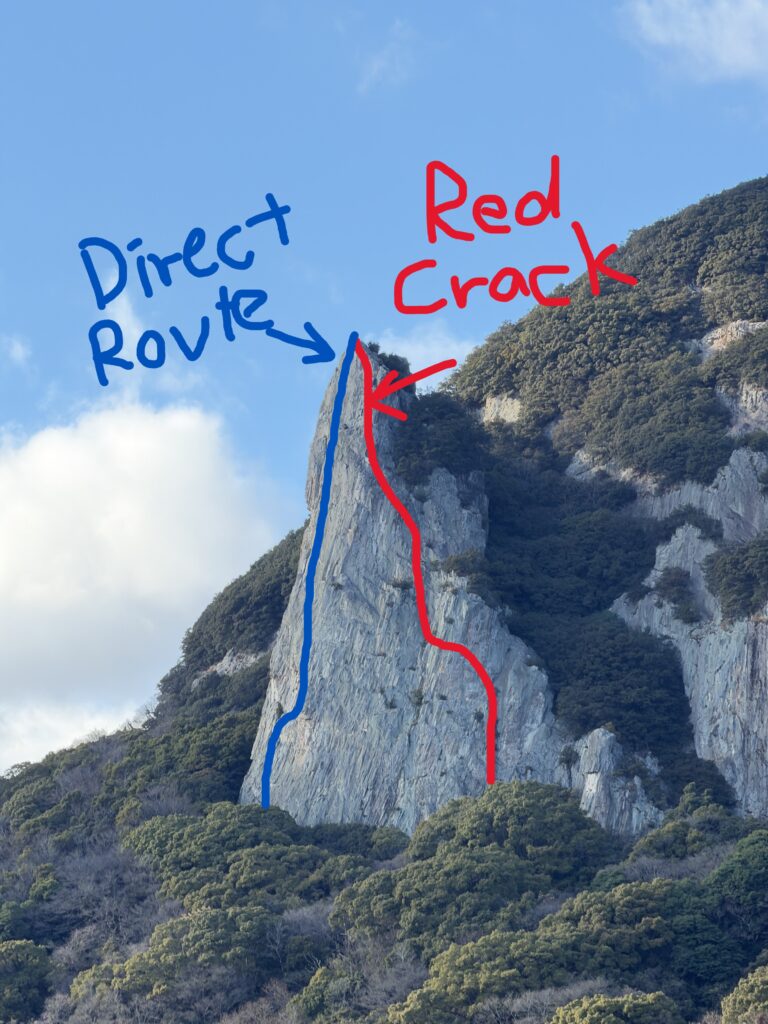
5.Recommended Routes
・Direct Route (5.11b, 5 pitches)
This is the route we climbed.
True to its name, it follows a straight, proud line up the face of Oyayubi-dake. Sustained, varied, and very satisfying.
・Red Crack (5.10b, 5 pitches)
Probably the most popular route on the wall.
With a friendlier grade, it’s accessible to many teams and offers excellent climbing throughout.
6.Access to Oyayubi-dake
To shodoshima
Reaching Shodoshima may look complicated at first, but it is actually very straightforward once you understand the ferry connections.
Below is a detailed step-by-step guide from major cities in Japan.
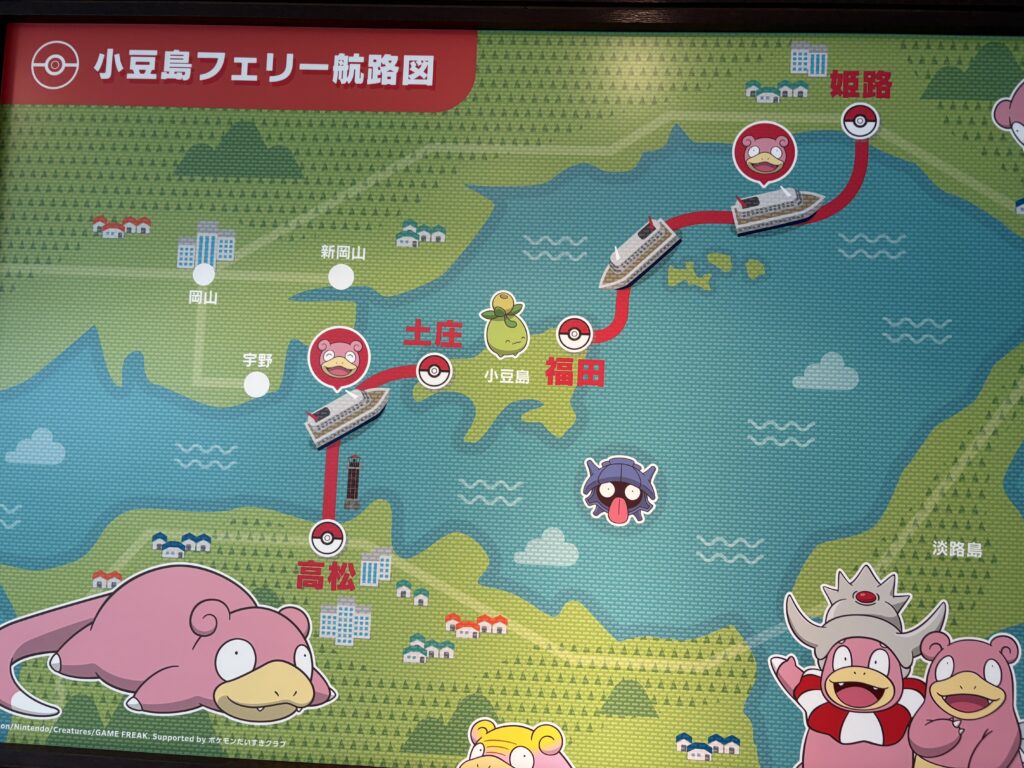
Route 1: Via Himeji (Recommended)
This is the route I personally used, and it is one of the easiest and most comfortable options.
From Tokyo
Tokyo → Himeji Station (Shinkansen (bullet train): approx. 3–3.5 hours)
Himeji Station → Himeji Port (Local bus: approx. 20 minutes)
Himeji Port → Fukuda Port (Shodoshima) (Ferry: approx. 100 minutes)
**Fukuda Port is the closest port to Oyayubi-dake (&Yoshida Crag), making this route very convenient.

From Osaka
Osaka → Himeji Station (Shinkansen: approx. 30 minutes)
Himeji Station → Himeji Port (Local bus: approx. 20 minutes)
Himeji Port → Fukuda Port (Ferry: approx. 100 minutes)
Route 2: Via Okayama
This route is commonly used and well connected, but you will arrive at Tonosho Port, which is farther from the crag.
From Tokyo
Tokyo → Okayama Station (Shinkansen: approx. 3.5 hours)
Okayama Station → Uno Port (Local bus: approx. 60 minutes)
Uno Port → Tonosho Port (Shodoshima) (Ferry: approx. 60–90 minutes)
From Osaka
Osaka → Okayama Station (Shinkansen: approx. 45 minutes)
Okayama Station → Uno Port (Local bus: approx. 60 minutes)
Uno Port → Tonosho Port (Ferry: approx. 60–90 minutes)
Route 3: Via Takamatsu
This route is useful if you plan to combine your trip with sightseeing in Shikoku.
From Tokyo
Tokyo → Takamatsu (Flight: approx. 100 minutes OR train: approx. 4–4.5 hours (Shinkansen + local trains)
Takamatsu Station → Takamatsu Port (Walk: approx. 7 minutes)
Takamatsu Port → Tonosho Port (Shodoshima) (Ferry: approx. 60 minutes)
From Osaka
Osaka → Takamatsu (Train: approx. 4–4.5 hours)
Takamatsu Station → Takamatsu Port (Walk: approx. 7 minutes)
Takamatsu Port → Tonosho Port (Ferry: approx. 60 minutes)
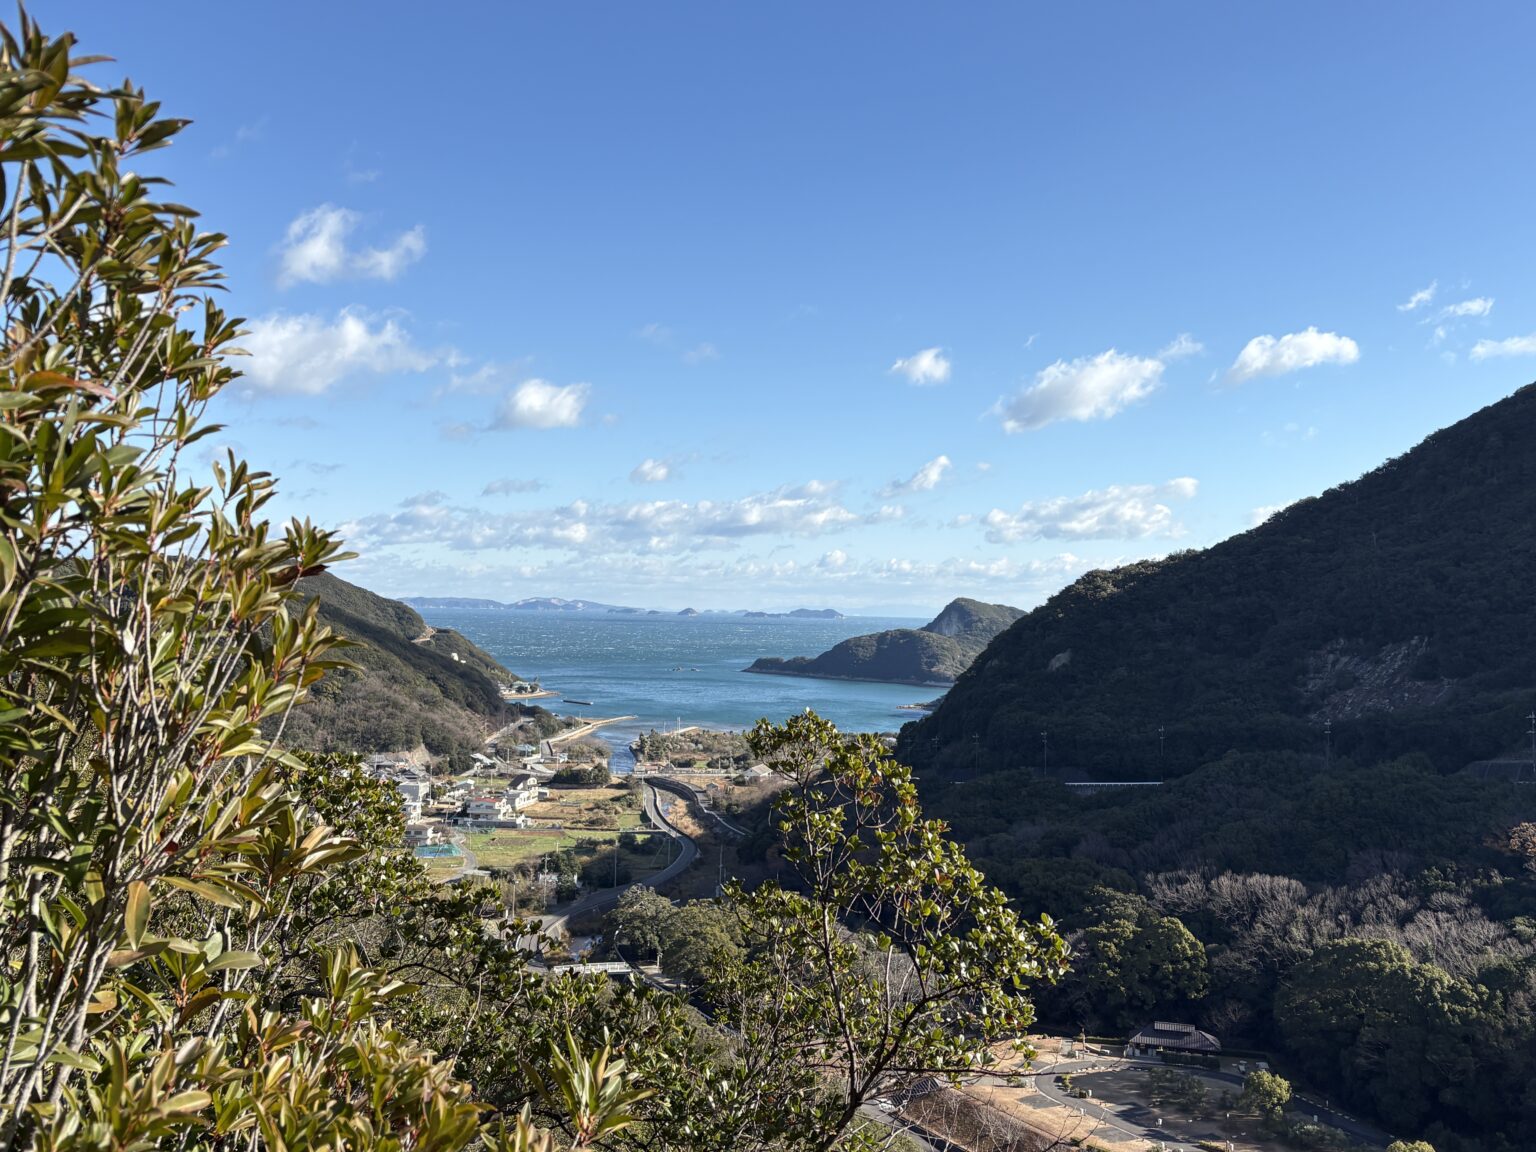
From Shodoshima Ports to Oyayubi-dake
After arriving on Shodoshima, head toward Tachibana village.
Setting your car navigation to Kojingu Shrine (荒神宮) works well.
・From Fukuda Port: ~15 min by car
・From Tonosho Port: ~35 min by car
7.Parking & Approach
Parking: please refer to the map below for the parking area.
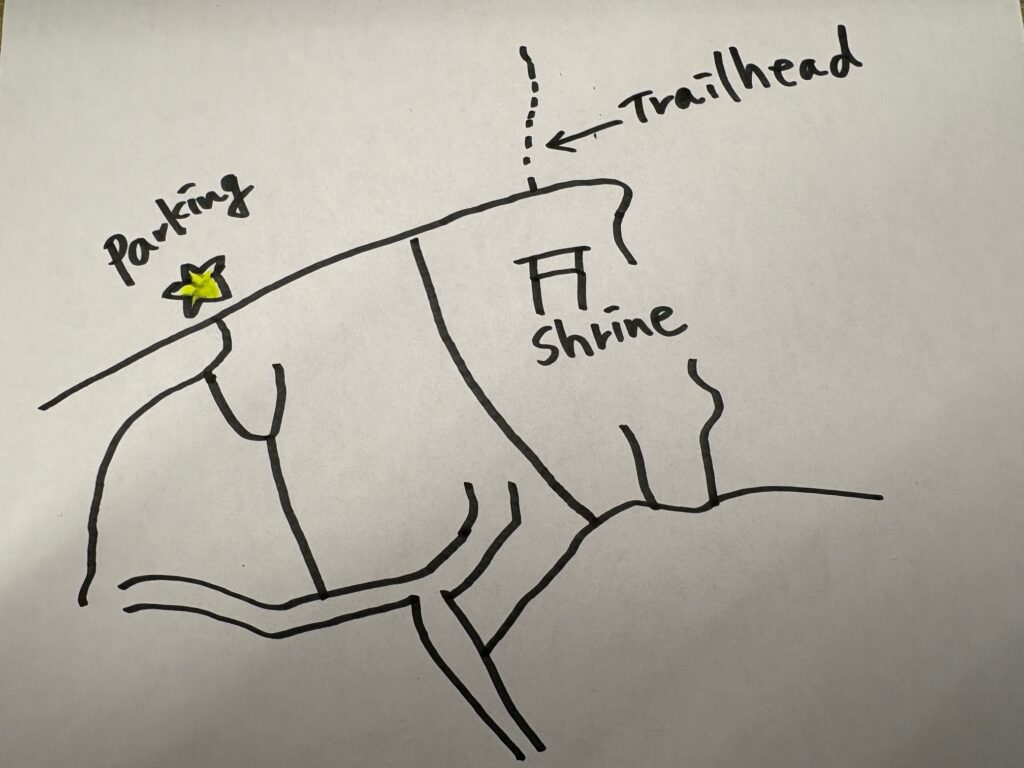
Approach:
From the parking area, follow the trail toward Oyayubi-dake.
You’ll see “親指岳” painted on rocks along the way.
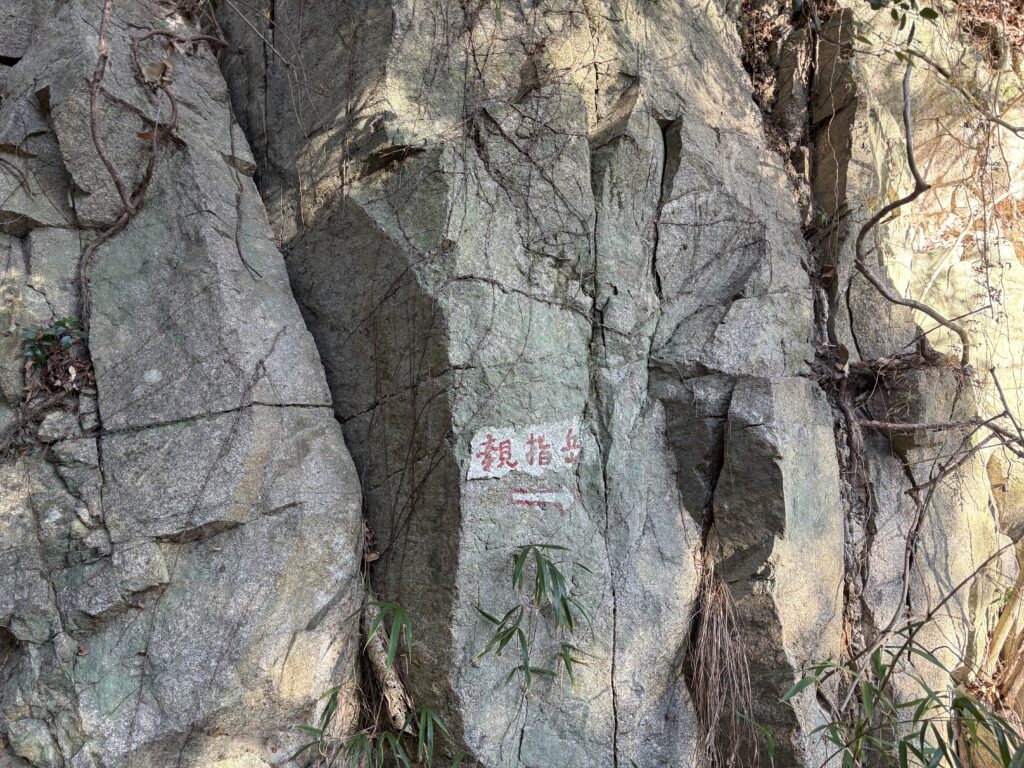
Enter the forest at the trailhead sign.
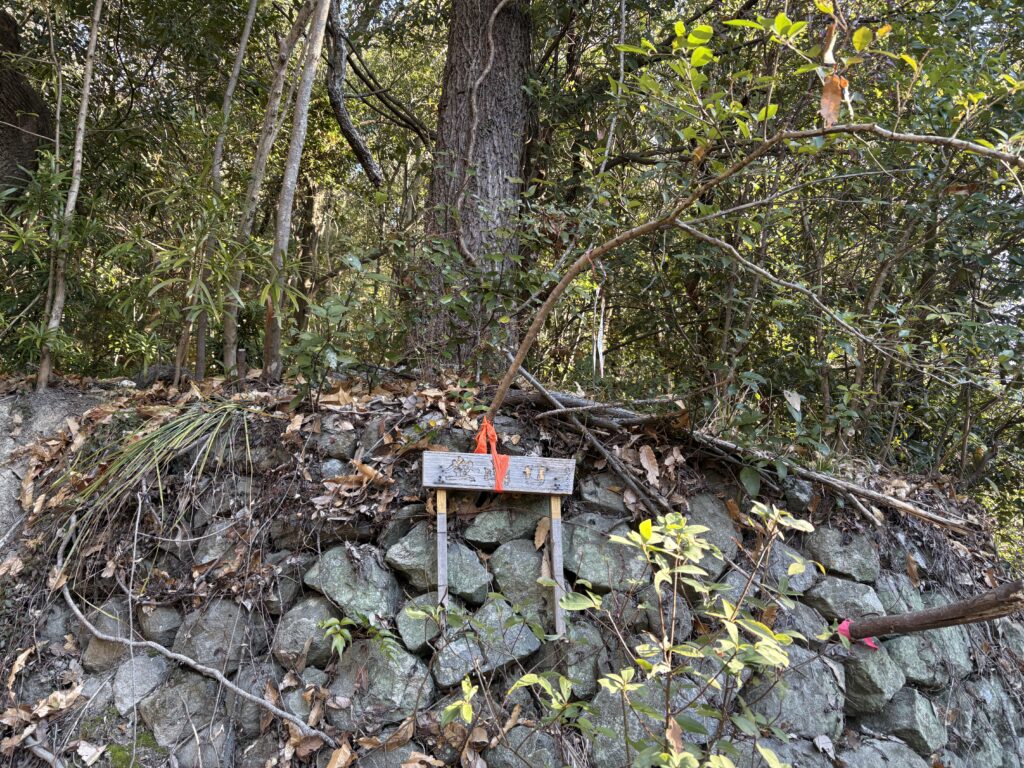
The path is clear, with plenty of pink tape. Soon, a large granite wall appears.
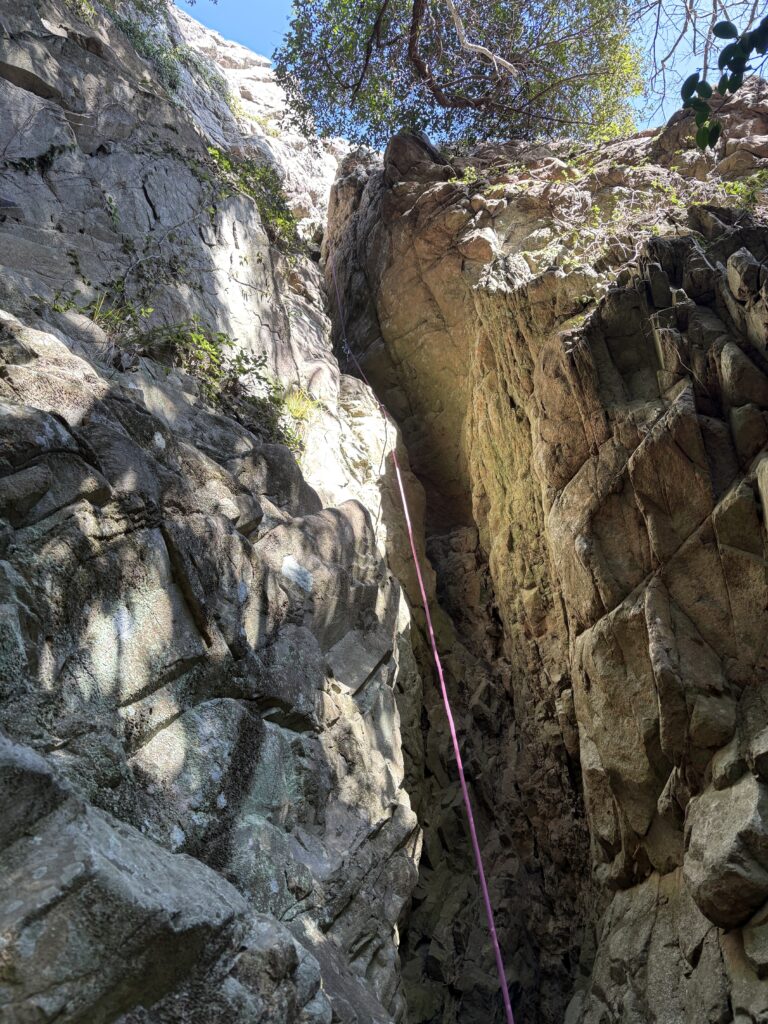
You’ll encounter a fixed rope — this is the descent route. We mistakenly started climbing it at first.
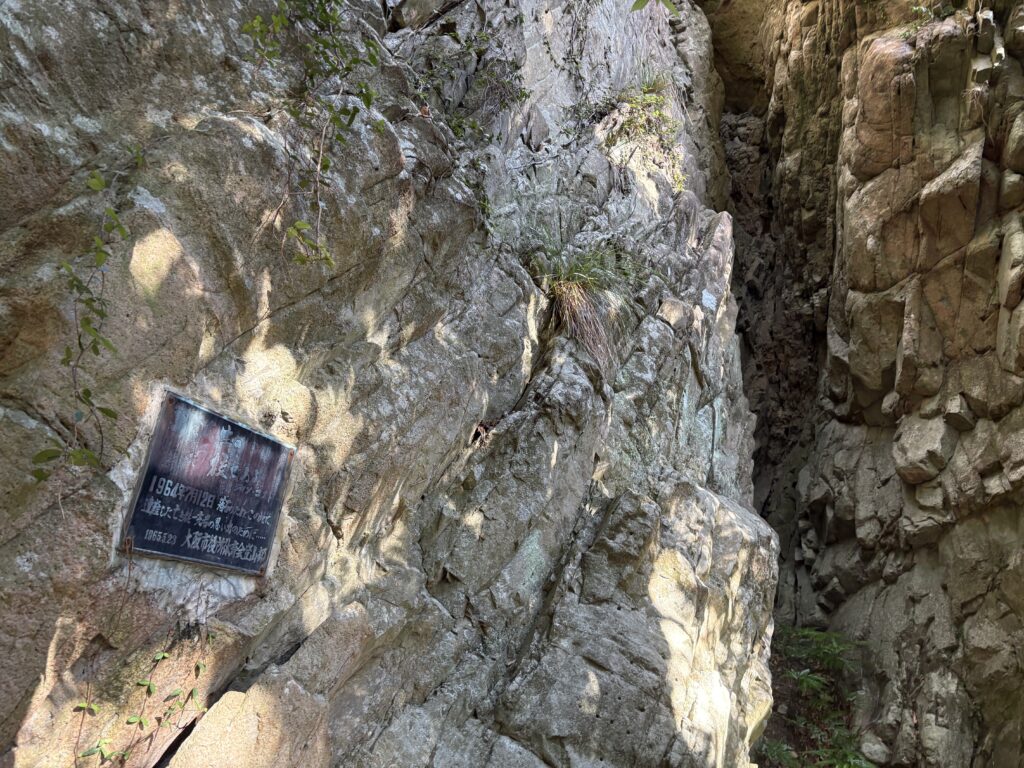
For the start of Direct Route, continue left horizontally along the base.
After 5–10 minutes, you’ll see a relief carved into the rock — that marks the start.
Total approach time: ~30 minutes.
8.Route Details – Direct Route (5.11b)
Route Overview
Pitch 1 (20m/5.8 approx. French 5b)
Pitch 2 (20 m/5.9 approx. French 5c)
Pitch 3 (30m/5.10b approx. French 6a+/6b)
Pitch 4 (40m/5.11b approx. French 6c/6c+)– Crux Pitch
Pitch 5 (30m/5.8 approx. French 5b)
Pitch 1 & 2 (5.8 & 5.9/20m&20m approx. French 5b & 5c)
We linked these pitches.
Pitch 1 is a chimney with solid footholds — fun climbing.
I was a follower and climbing with a backpack was awkward, so I clipped it to my harness.
Pitch 2 starts comfortably, with the next belay clearly visible.
The final section near the anchor is the crux. The belay bolts are new.
I remember thinking: “If this is 5.9, what’s coming next…?”
Pitch 3 (5.10b/30m approx. French 6a+/6b)
The crux comes at the beginning, up to the point where you pull over a small roof.
The rock looked fragile and required careful, deliberate movement, but it held together and I was able to climb through without anything breaking.
Above the roof, the route follows a flake system.
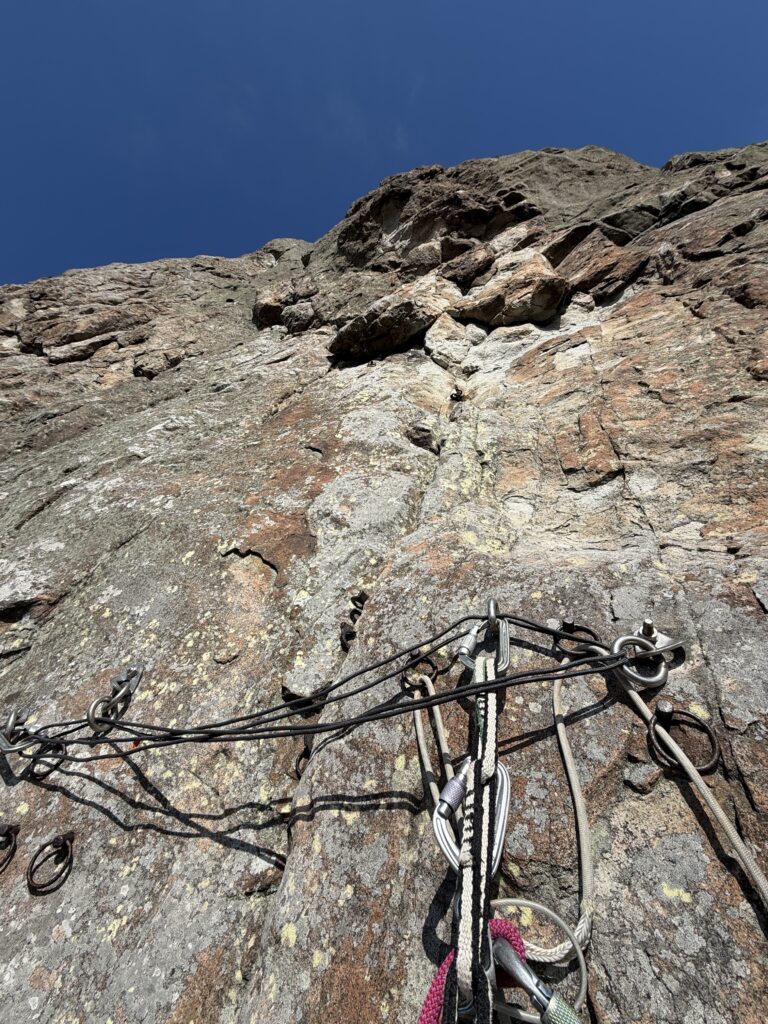
There are many old fixed pitons and ring bolts along the line, so route-finding is straightforward.
However, all of these fixed pieces are very old, and I hesitated to trust any of them. It’s safer not to use them.
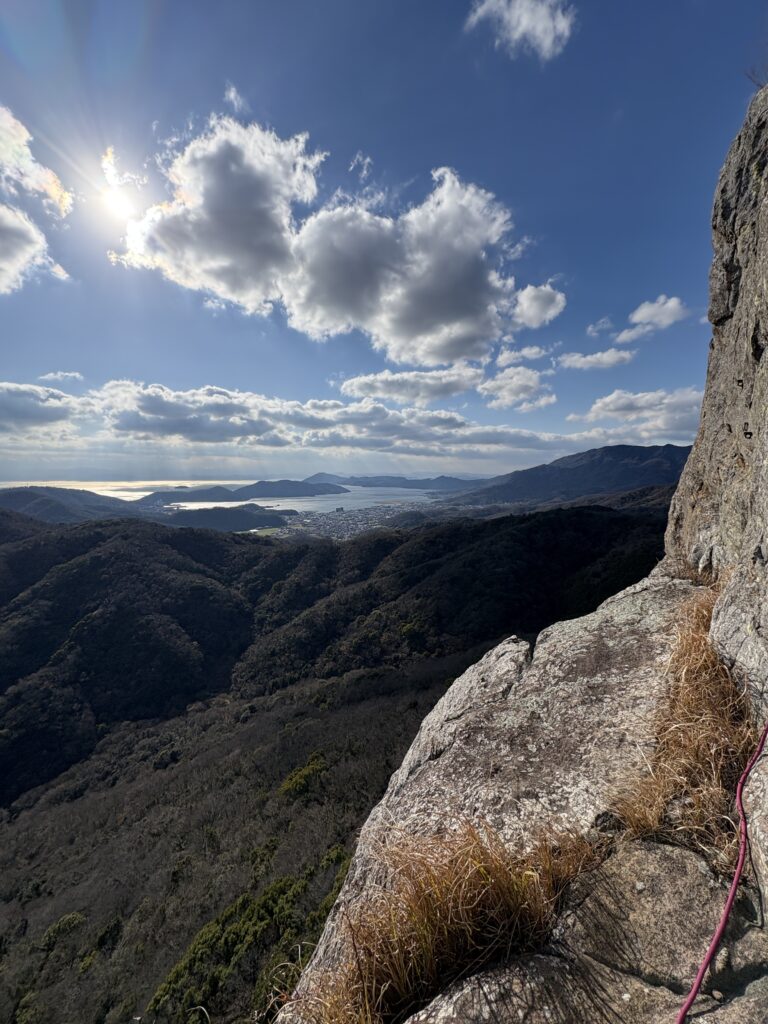
The belay stance is excellent, with clean, modern bolts and a comfortable terrace underfoot.
From there, you can calmly take in a wide, uninterrupted view of the Seto Inland Sea — a moment that really lifted my spirits.
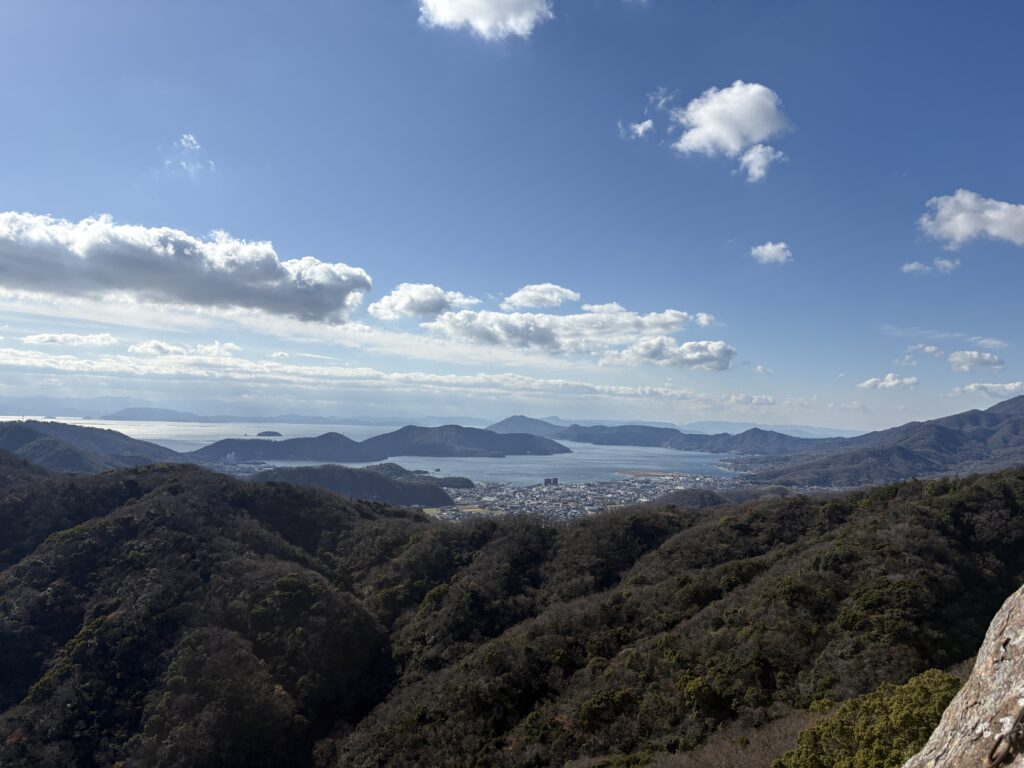
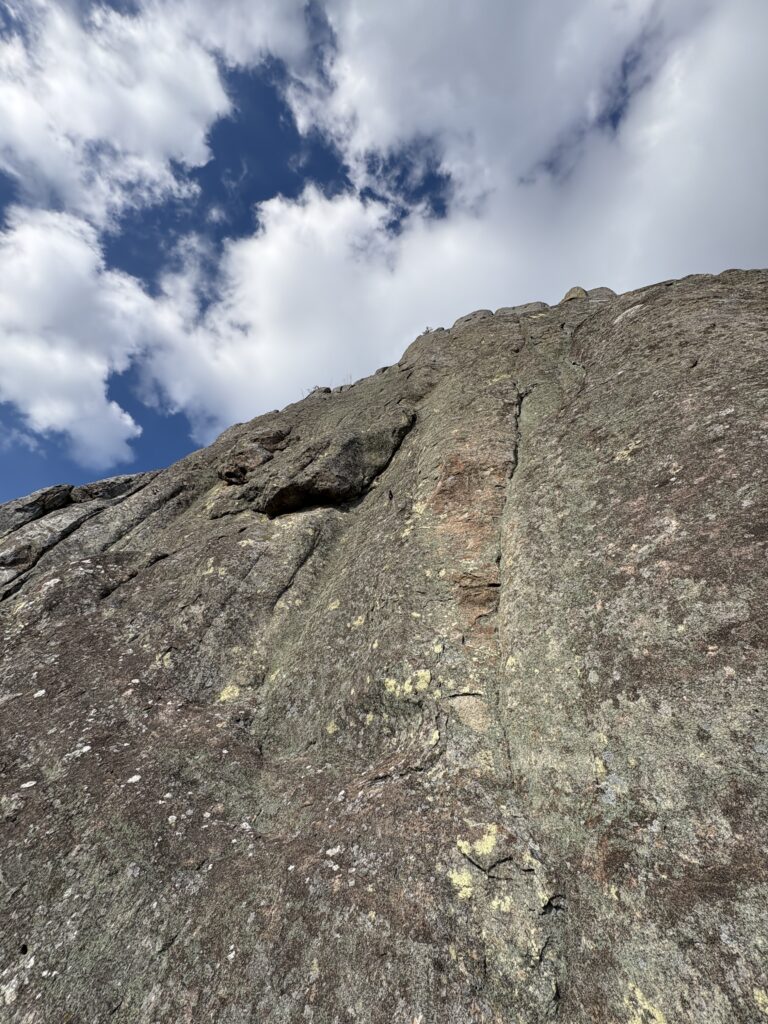
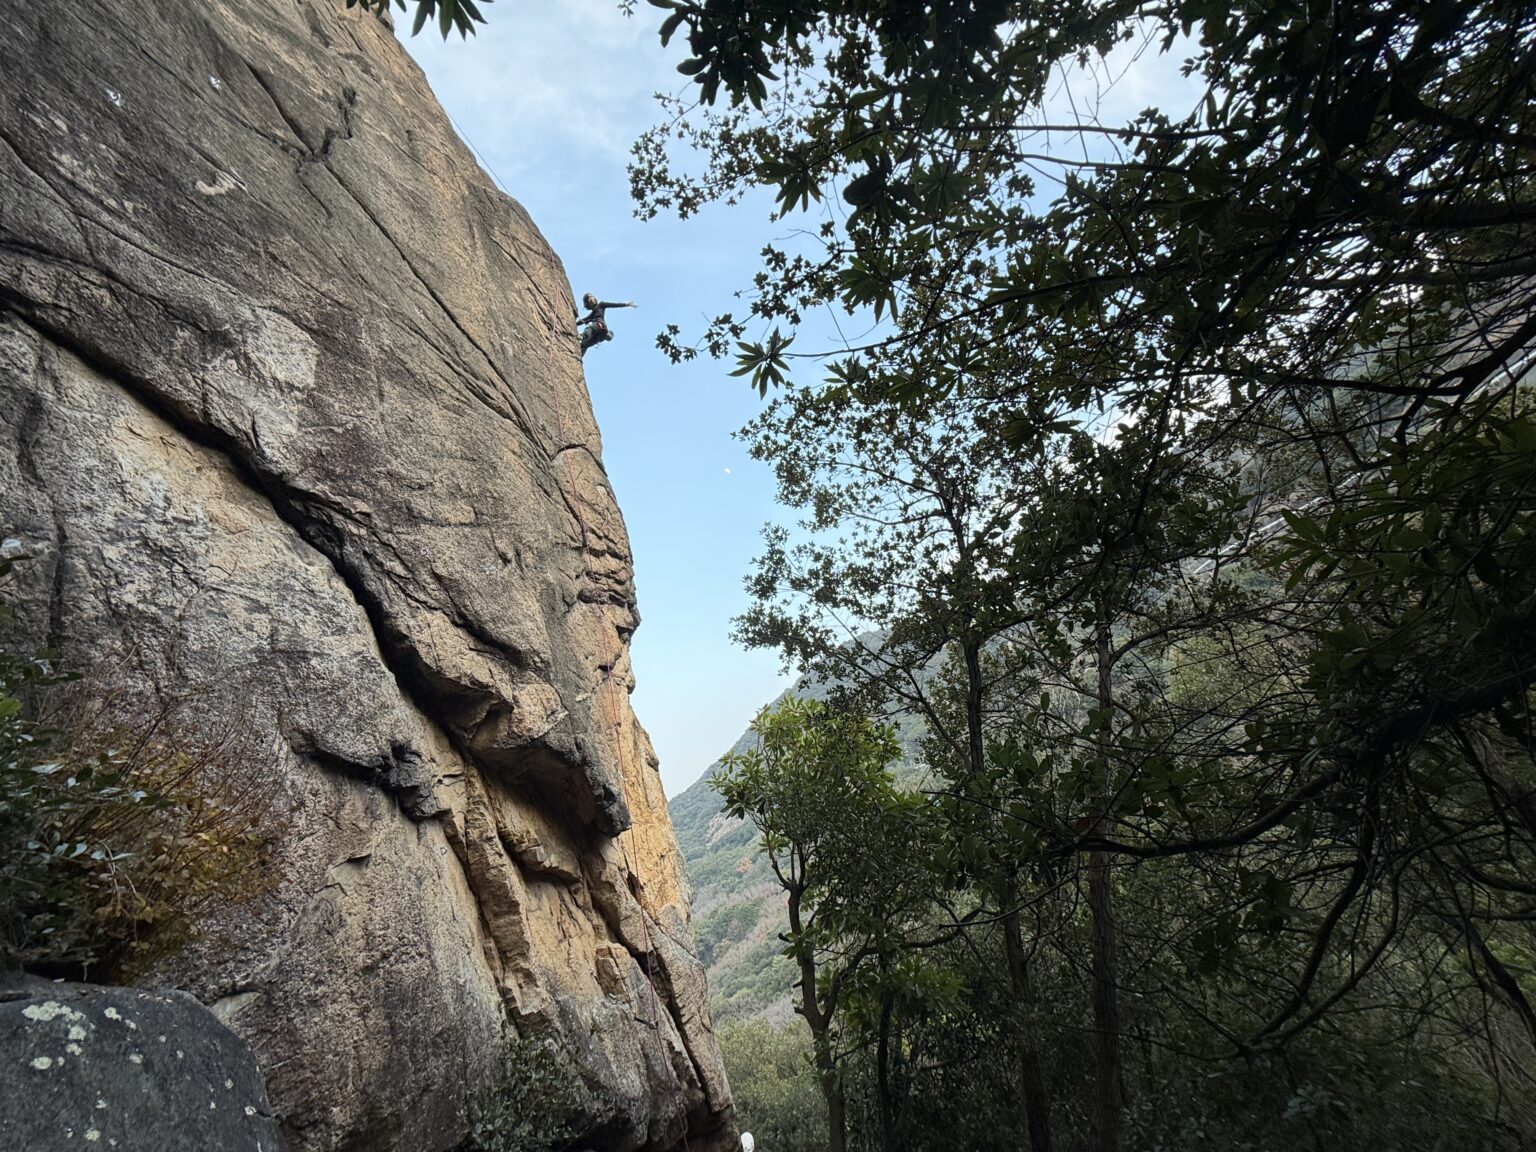
Pitch 4 (5.11b/40m approx. French 6c/6c+)– Crux Pitch
The hardest pitch.
You climb up and left, then continue into a section of columnar granite.
As with the previous pitch, there are many old fixed pitons and ring bolts, making the line easy to follow, but they are clearly aged and best avoided.
In contrast, there are several newer Petzl bolts, which can be trusted and provide reassurance where needed.
One comforting aspect of this pitch is that the belayer can see the climber the entire time, which adds a strong sense of security.
The rock here also feels somewhat fragile and can be unsettling, but the difference between soft and solid sections is very clear to the touch. By moving carefully and deliberately, it can be climbed without issue.
Holds are spaced far apart, and as the crux pitch, it demands full commitment and focused climbing.
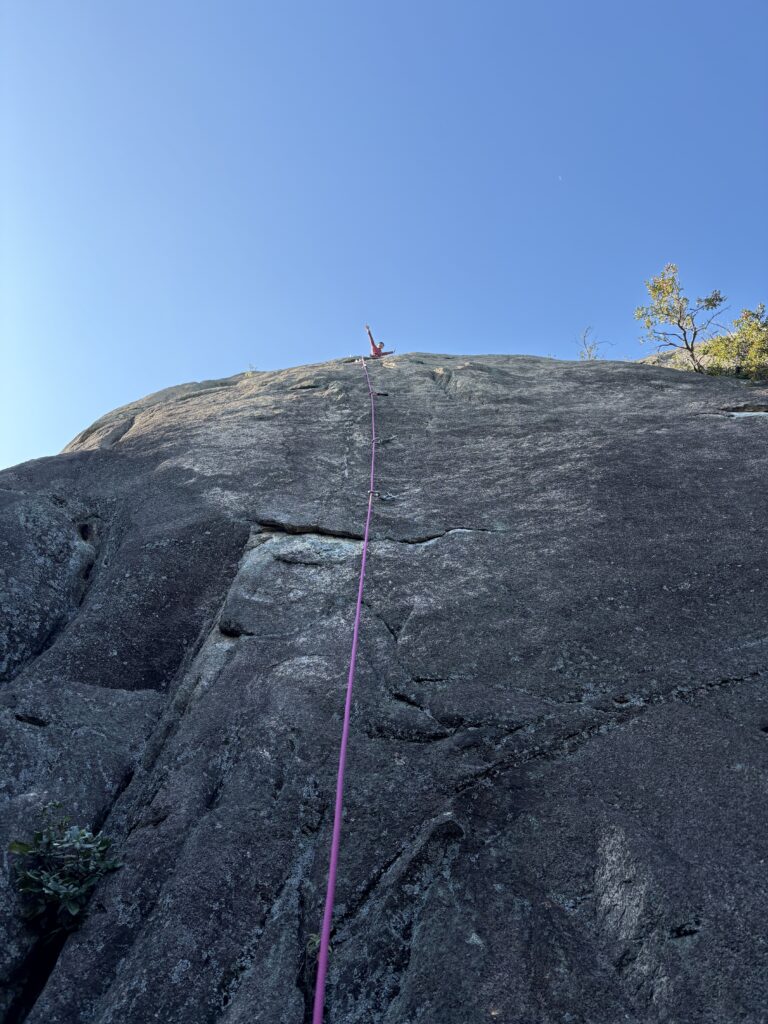
Pitch 5 (5.8/30m approx. French 5b)
The final pitch, where the route joins Red Crack.
You begin by traversing around to the left.
The climbing is mostly stepped and straightforward — the kind of pitch that makes you think, “Yes, this is definitely 5.8!!”
It was surprisingly easy, especially considering it carries the same grade as the second pitch.
As with all pitches on this route, the belay anchors are equipped with clean, modern bolts, which is deeply appreciated.
With full exposure, increased height, and strong wind blowing across the wall, it quickly turned cold.
After taking a brief summit photo to mark the ascent, we began our descent almost immediately.
9.Descent
Walk left from the top to find fixed ropes. The descent is well-marked and straightforward.
Time back to the base: ~15 minutes.
Rappelling requires two ropes over 50 m and follows the Direct Route.
Walking down is much easier and recommended.
10.Gear Used
Quickdraws: 12 (include 4 × alpine draws (60 cm) +1 × alpine draw (30 cm))
Slings: 1 × 240 cm / 3 × 180 cm / 2 × 120 cm
PAS (Personal Anchor System): 1 per climber
Cams: sizes #0.2–#2
Rope: 60 m rope
11.Climbing Shops
There are no climbing shops on Shodoshima.
Bring all necessary gear with you.
12.Other Shodoshima Climbing Areas
・Yoshida Crag

・Main climbing area
・100+ sport routes (5.8–5.11 range, few 5.12 over)
・Slab, face, and crack climbing
・10-minute approach
For a detailed guide to this area, check the link below.
・Akadake
・Opened in 2022
・70+ sport routes
・Steep, long, overhanging routes
・Rock can be fragile — helmet recommended
・Insubong (Kurodake / Tengu Rock)
・Exposed, scenic climbing
・Fewer routes but high quality
・Worth visiting for the location alone
13.Rest Day Ideas
Details are covered in the overview article.
14.Accommodation
・Yoshida Campground
Best base for climbers.
Close to the crag, with hot springs — simply ideal.
・Nishinoie Shodoshima (traditional ryokan)
It’s a special trip — sometimes you want to stay somewhere nice.
If you do, I recommend choosing a traditional Japanese ryokan rather than a standard hotel.

西の家 nishinoie 小豆島
Agoda・Olivean Shodoshima Sunset Hill Hotel
Ocean-view rooms and an excellent sunset onsen.

Olivean Shodoshima Sunset Hill Hotel
Agoda15.Final Thoughts
I’ve climbed in many places across Japan and overseas. Every trip stays with me, but multi-pitch climbing while traveling has always created the strongest memories.
That’s why I wanted to introduce Oyayubi-dake.
Shodoshima is more than just climbing. Its climate, culture, food, and slow island rhythm make it a place to truly experience — not just visit.
I hope you’ll enjoy not only the climbing, but also everything that surrounds it.
I’ve been fortunate to receive kindness and support from climbers around the world. Writing this guide is my small way of giving something back.
I hope this article helps make your trip smoother, deeper, and more meaningful — and that Shodoshima becomes a place you’ll remember long after you leave.
For more climbing and trekking articles in Japan, please see the links below.


