
In the previous article, we covered the highlights of the Volcano Trail. Now, let’s get into the practical details: recommended durations, section hikes, and the specific itinerary I followed.
This guide is for hikers who want to design their own Volcano Trail experience-whether as a full traverse or selected day sections!
Contents.
1.Full Traverse Options
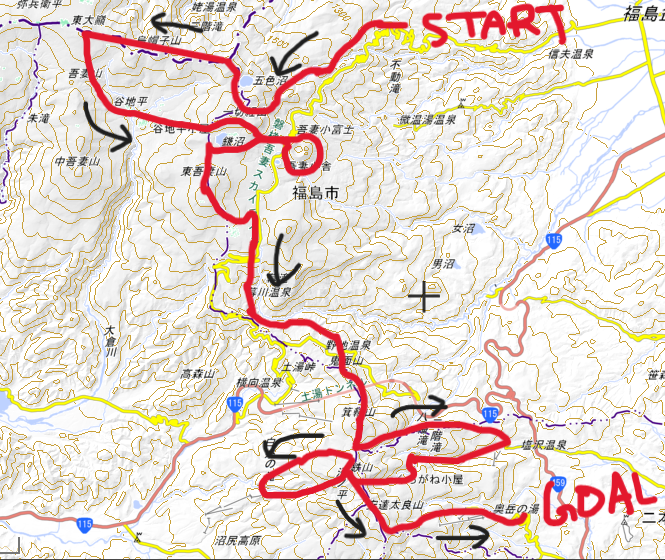
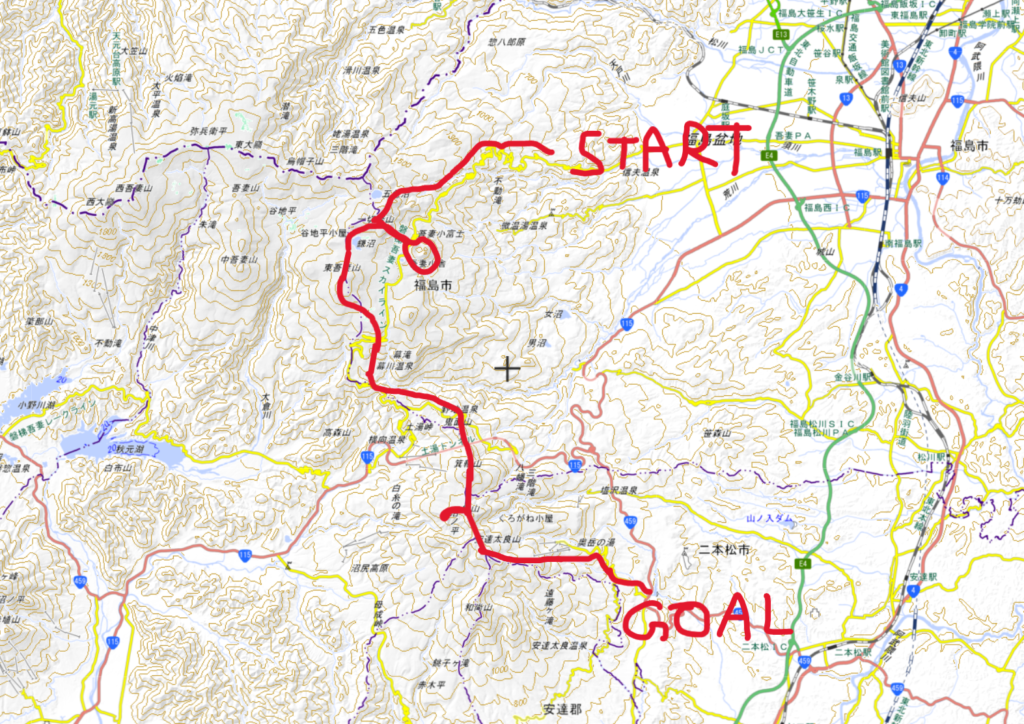
The Volcano Trail stretches approximately 72 km from the Azuma area to the Adatara area in Fukushima Prefecture.
The full route looks like this:
Azuma Area
Takayu Onsen → Mt. Issaikyo → Yajidaira→ Jododaira → Mt. Azuma-Kofuji → Kamanuma → Mt. Higashi-Azuma
Transition Section (Azuma to Adatara)
Makukawa Onsen → Noji Onsen
Adatara Area
Mt. Minowa → Umagaeshi → Kurogane Hut → Tainai-iwa → Mt.Funamyojin → Mt. Adatara → Dake Onsen.
Pro Tip: I highly recommend hiking North to South (Takayu to Dake Onsen). This direction is safer for navigating volcanic scree, provides better views, and finishes at a well-connected Onsen town.
2.How Many Days Do You Need?
The official guide suggests 4 days / 3 nights.
However, this is a long-distance trail — and its greatest strength is flexibility. You can shorten or extend it depending on your time and fitness.
My husband and I completed a customized 3-day / 2-night version.
We skipped:
• Yajidaira Area: We heard reports that it was heavily overgrown (bushwhacking) and difficult to navigate.
• Umagaeshi / Kurogane Hut: We initially worried about Day 2 being too long (though in hindsight, we had plenty of energy!).
• Tainai-iwa / Shoji-iwa: Once we saw the majestic ridgelines of Umanose and Ushunose, we decided we wanted to walk that scenic path instead.
The official trail is 72 km, but our modified itinerary was about 50 km.
3.Itinerary Planning
• 1 Day: Focus on Mt. Adatara OR Mt. Azuma only.
• 3 Days / 2 Nights: High-paced / Fit hikers (with some skips as we did).
• 4 Days / 3 Nights: The standard full traverse.
• 5 Days / 4 Nights: The “Ultimate Onsen” pace—staying at inns.
4.Our 3-Day Itinerary
• Day 1: Takayu – Nakatengu – Mt. Issaikyo – Jododaira – Mt. Azuma-Kofuji
• Day 2: Jododaira – Mt. Higashi-Azuma – Makukawa Onsen – Noji Onsen – Tetsuzan Hut
• Day 3: Tetsuzan Hut – Umanose – Mt. Adatara – Dake Onsen
5.Best Section Hikes (Top Day Hikes on the Volcano Trail)
Course 1. Takayu to Jododaira (The Ever-Changing Route)
• Grade: Moderate (For experienced hikers) | 10km | Elevation gain: 1,354 m |6 hr 45 min
• Water: No reliable water source. There is a stream crossing where water filtration is possible. At Jododaira Visitor Center (9:00–16:00, closed mid-November to late April), drinks are available.
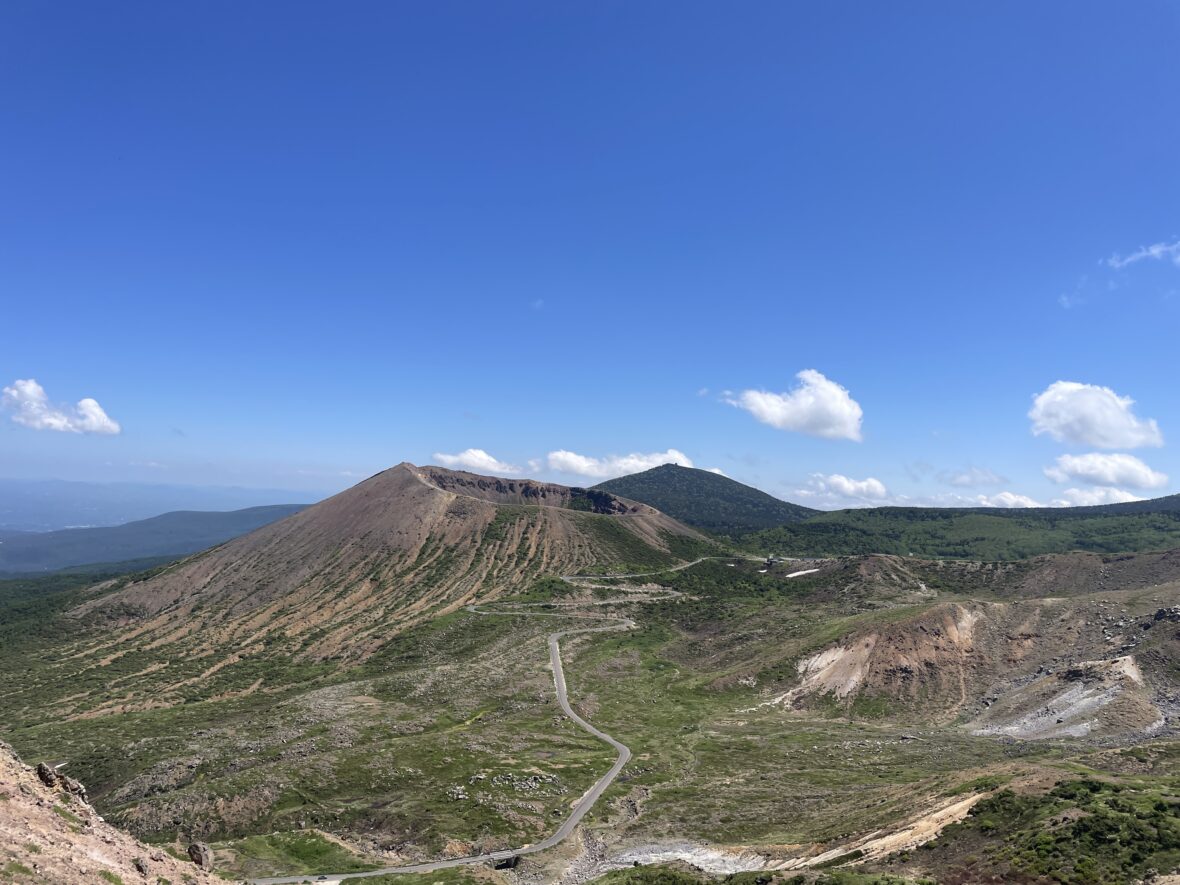
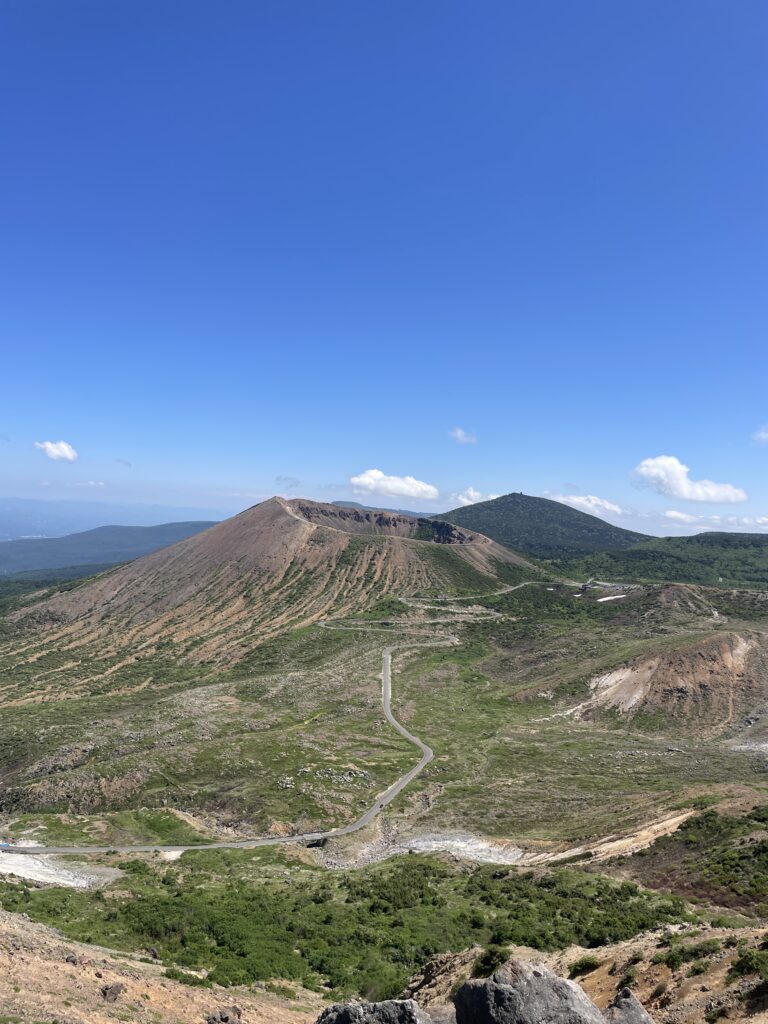
• Up to Nakatengu, you walk through quiet, moist forest. After Rakuda-yama, the landscape opens dramatically — Mt. Azuma-Kofuji, Goshikinuma (“Witch’s Eye”), and volcanic pine landscapes unfold one after another. The constantly changing scenery keeps the day exciting.
Course 2. Mt. Azuma-Kofuji Loop (The Bonus Track)
• Grade: Very Easy (Great for families/tourists) | 2km | Elevation gain: 127 m | 1hr
• Located directly in front of Jododaira Visitor Center, this is the easiest volcanic walk in the area. You can do it in sneakers.
It may be too short to call a true “section hike,” but it’s perfect if you are visiting as a tourist or traveling with family.
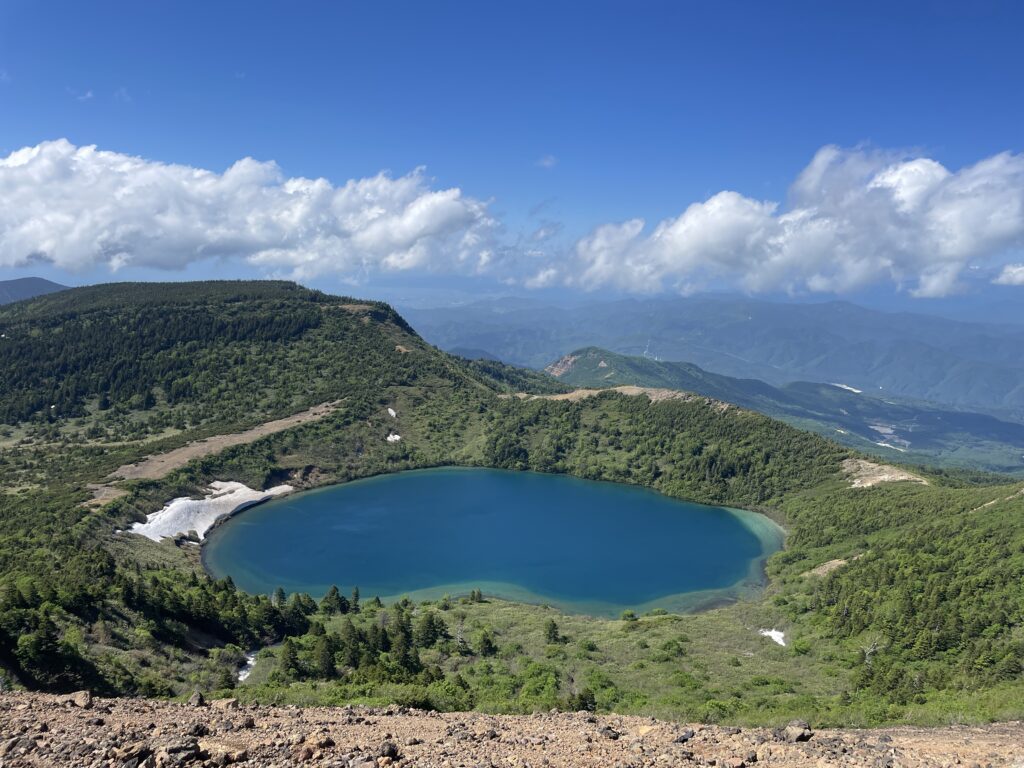
Course 3. Jododaira to Mt. Issaikyo (Best for “Blue Hole” Views)
• Grade: Easy | 5.6km | Elevation gain: 376 m | 2 hr 40 min
• Water: None on trail. Drinks available at Jododaira Visitor Center.
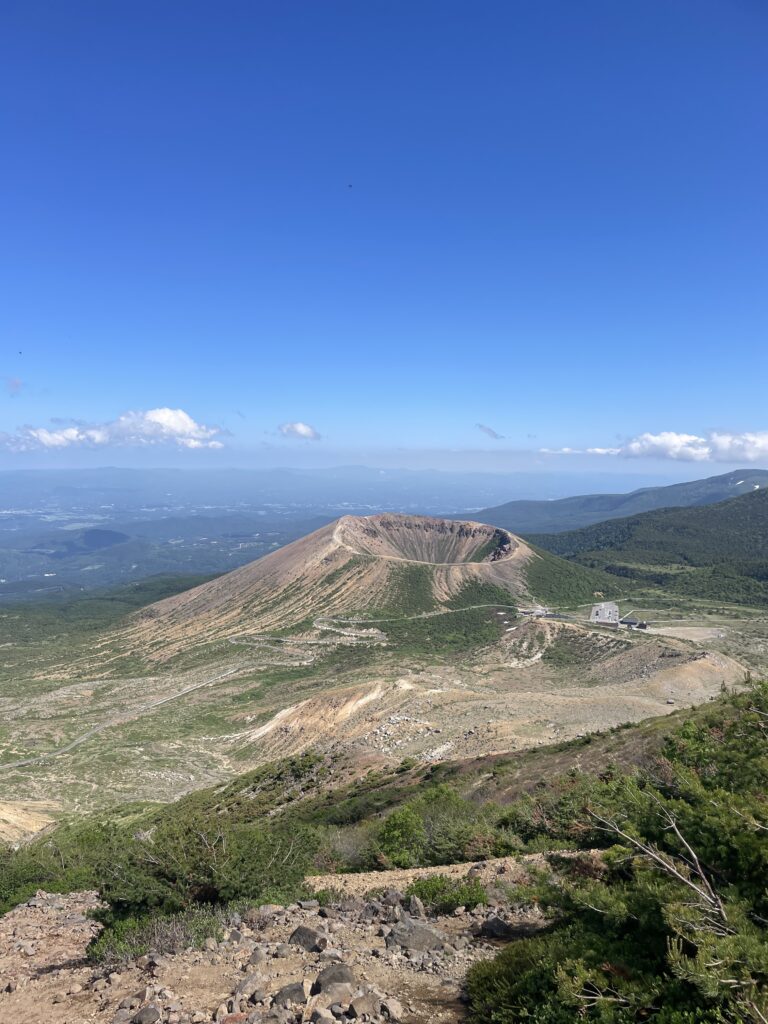
• This out-and-back route takes you to Mt. Issaikyo to see Goshikinuma, also known as “The Witch’s Eye.”
You begin by walking peacefully across the Jododaira wetlands on wooden boardwalks, then climb to the summit viewpoint. In less than three hours round trip – making it ideal even for families.
Course 4. Jododaira to Yachidaira Loop (Slow Walk through Wetlands)
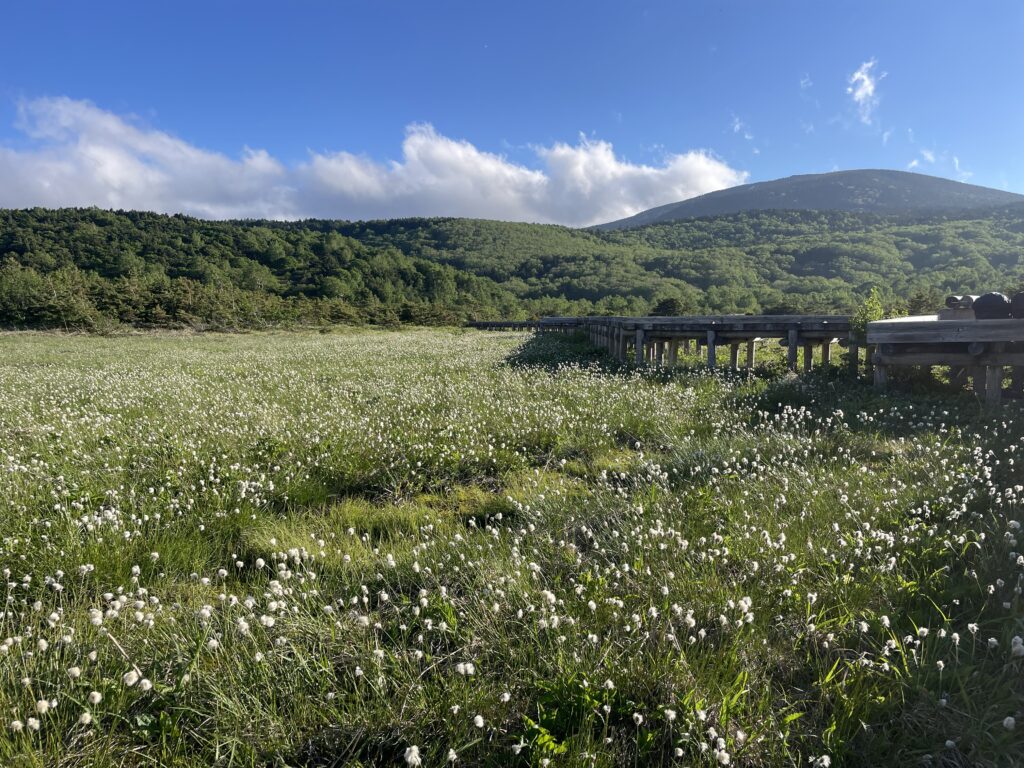
• Grade: Easy | 11.3km | Elevation gain: 538 m | 4 hr 30 min
• This route crosses Sugandaira, Kama-numa, and Yaji-daira wetlands.
Elevation gain is modest for the distance, and parts of the trail have well-maintained boardwalks. There are no dramatic highlights, but it’s perfect for a relaxed volcanic landscape stroll.
Course 5. Noji Onsen to Dake Onsen (Tough Start, Rewarding Finish)
• Grade: Moderate | 11.3km | Elevation gain: 827 m| 6 hours
• Water: Available between Mt. Minowa and Tetsuzan Hut (Filter recommended).
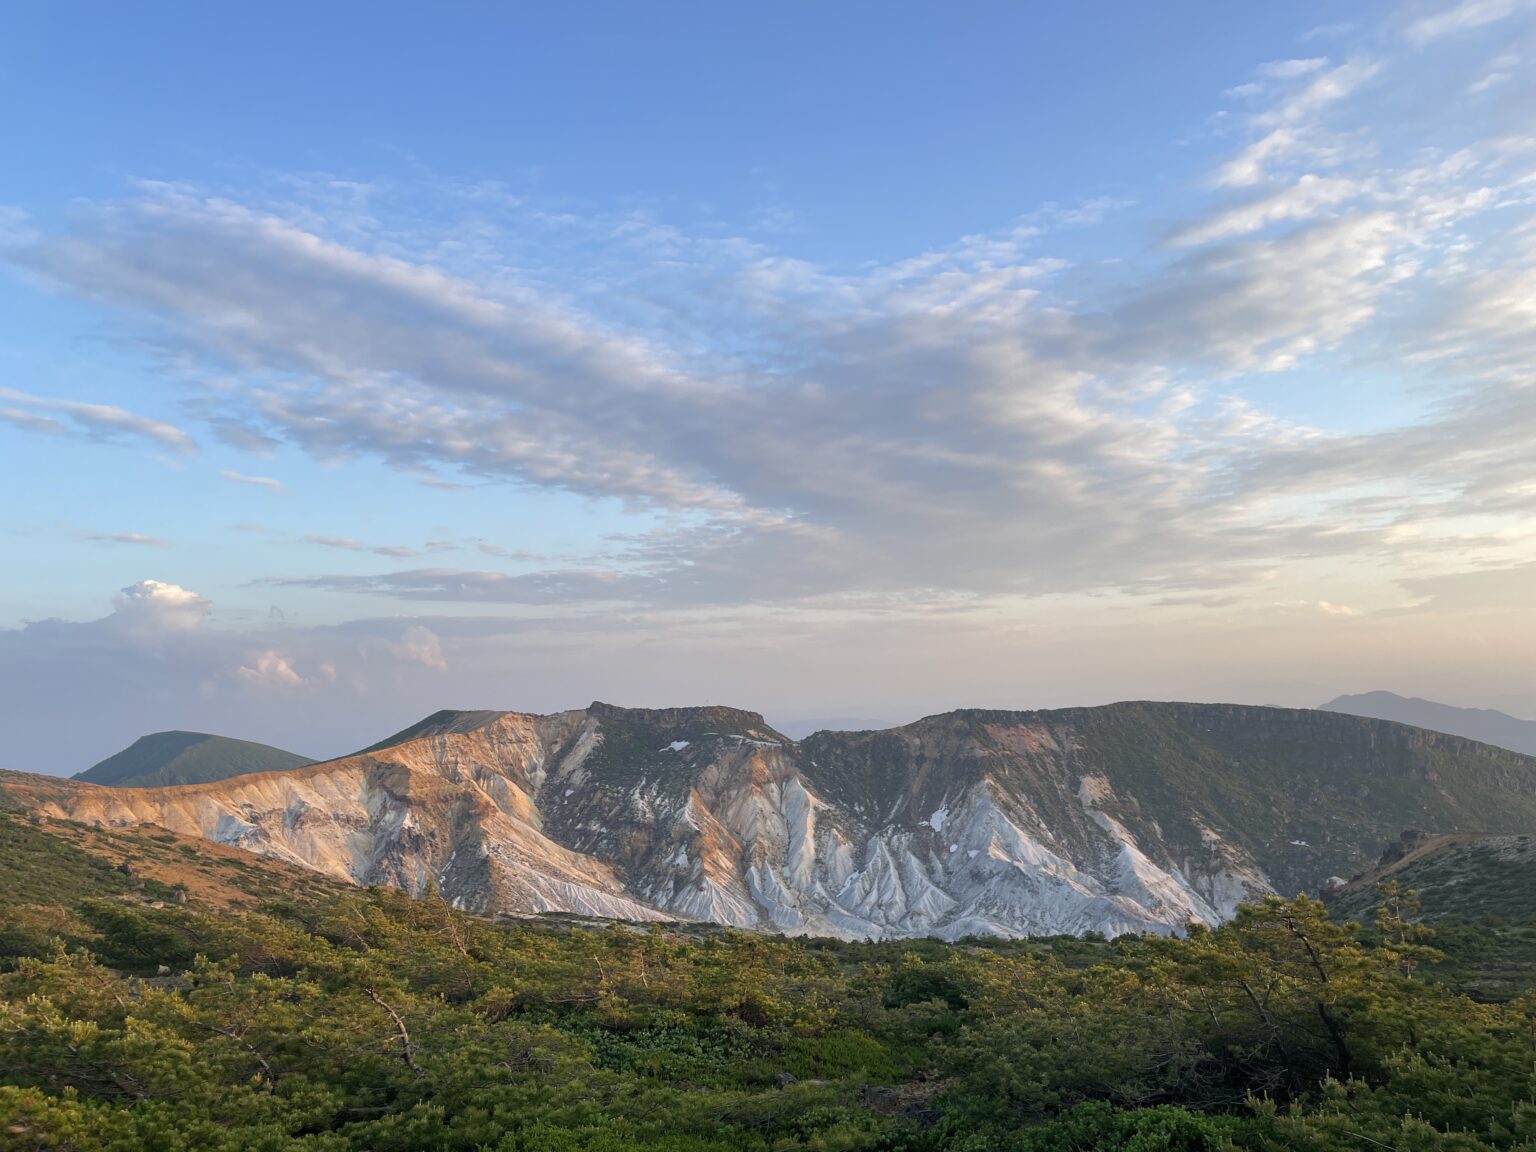
•The climb from Noji Onsen to Mt. Minowa can feel long and exposed with limited views. But after Minowa, the scenery opens beautifully, revealing the deep mountains of Fukushima.
You cross the dramatic Numanotaira crater and summit Mt. Adatara before finishing at Dake Onsen.
Course 6. Dake Onsen to Mt. Adatara (The Classic Popular Summit Route)
• Grade: Easy to Moderate | 8.8km | 5 hrs
• Mt. Adatara also has a ropeway. Using it reduces summit time to about 1.5 hours, making it accessible for families.
Without the ropeway, the round trip is 8.8 km and about 5 hours. It’s a steady climb up and down, which may feel challenging for beginners. In summer, be prepared for a long climb through tall brush that can be very humid.
6.Access
Getting There – Takayu Onsen
From Tokyo to Fukushima Station: approx. 90 minutes by Shinkansen.
From Fukushima Station to Takayu Onsen: 36 minutes by bus (3 buses per day). Link here.
Returning – Dake Onsen
Dake Onsen to Nihonmatsu Station: 25 minutes by bus. Link here.
From Nihonmatsu Station, trains run roughly once per hour toward both Koriyama and Fukushima. Link here.
7.Onsen Towns: Your Cultural Base Camps
1. Takayu Onsen
The starting point of the Volcano Trail.
It has ranked No.1 in national hot spring satisfaction surveys. The milky sulfur waters are unforgettable.
Recommended stay: Adachiya Ryokan
An adults-only hidden retreat (junior high age and above), offering refined service and quiet luxury — the perfect way to begin your adventure.

2. Makukawa Onsen
Located deep in the mountains beyond Tsuchiyu Onsen, Makukawa Onsen is wrapped in complete silence.
It’s a true hidden hot spring. Day-use baths are available — perfect for washing off trail dust.
Recommended stay: Mito-ya Ryokan
A remote mountain onsen where you can simply slow down and let your body and mind recover.

3. Noji Onsen
Closer to the Adatara area, its cloudy sulfur baths are incredibly popular and make an ideal mid-journey stop.
Recommended stay: Noji Onsen Hotel
With six different baths to explore, this is a true hot spring paradise. Soak, eat well, and do absolutely nothing — that simple luxury becomes pure happiness here.

4. Dake Onsen
The finish line of the Volcano Trail.
An atmospheric town with acidic springs famous for skin health. It’s the perfect way to soothe tired legs after several days on the trail.
Recommended stay: Hanakanzashi
Originally built in the Taisho era, the building maintains historic charm while rooms are beautifully maintained. Great atmosphere, great baths, great food, great views — everything you need to end the journey well.

8.Gear List: What’s in My Pack (June Trip)
Here is exactly what I carried for this 3-day trek in June. Use this as a reference for your weight and volume planning.
This is not an ultralight setup-just what worked comfortably for us in early summer conditions.
• Shelter & Sleep: Tent, 3-season sleeping bag, and sleeping mat.

• Cooking: Burner, gas canister and water filter

• Clothing: * Insulation (Wool long-sleeve & Softshell jacket). Spare socks.
Note: Even in June, volcanic ridges can be windy and chilly.
• Electronics & Essentials: Mobile battery, headlamp, sunglasses, and sunscreen (UV rays are intense on the volcanic slopes).
・Map

• Health & Hygiene: First aid kit, toilet paper.
• Food & Water:
• 3 days of food
• 1 day’s worth of water: Carry one day’s worth of water. Always check your map for reliable water sources.
⚠️ Critical Supply Tips:
There are no convenience stores or restaurants directly along the trail.
• Jododaira Visitor Center: They sell snacks and souvenirs, but no bread, sandwiches, or rice balls. There is a restaurant for hot meals, but don’t count on it for trail rations.
• Onsen Areas: While you pass through hot spring towns, they are small and secluded. You will not find convenience stores or restaurants here. Pack all necessary calories from the start.
Next up: My Day-by-Day Trip Report (Day 1–3). I’ll share the photos of the “Witch’s Eye” and the carving-like ridges of Numanotaira!